> ## Documentation Index
> Fetch the complete documentation index at: https://visitdocs.planpoint.io/llms.txt
> Use this file to discover all available pages before exploring further.
# Creating a floor plan
> Three ways to produce the plan image every floor needs — from a professional 3D scan down to a free scan on your phone.
Every floor in a Visit needs a **floor plan image**. It is the surface buyers draw rooms on, hover over, walk through with viewpoints and furnish in the [floor plan editor](/features/floorplan-editor). Without it a floor still opens, but the plan pane shows a **Missing floor plan** placeholder.
If the property already came with a plan — from the architect, the listing, the previous agent — use it and skip straight to [Preparing the plan for your Visit](#preparing-the-plan-for-your-visit). If it did not, you have to make one.
## Pick your accuracy level
There is no single right answer — only a trade-off between how accurate the plan has to be, what hardware you own and how much you want to spend.
| | **High accuracy** | **Middle accuracy** | **Good enough, free** |
| ---------------- | --------------------------------------------------------------------------------------------------- | ------------------------------------------------------------- | ------------------------------------------------------------------------ |
| **Method** | Professional 3D scanner ([Matterport](#high-accuracy-matterport-and-other-3d-scanners) and similar) | [360° camera](#middle-accuracy-a-360-camera) + a plan service | [Planpoint Floorplan Scanner](#free-the-planpoint-floorplan-scanner-app) |
| **Hardware** | Dedicated scanner, or a compatible 360° camera | Insta360 X-series — the cheapest way in | An iPhone or iPad you already own |
| **Cost** | Highest — hardware plus a per-property fee | Camera once, then a per-plan fee | Free |
| **You also get** | A full 3D dollhouse and 360° tour | A 360° tour to link from your rooms | A 2D plan and a 3D model of the space |
| **Best for** | Prestige listings, new developments, anything sold on square metres | Most day-to-day listings | Quick turnarounds, rentals, a plan you need this afternoon |
Whichever route you take, the output you actually need for the Visit is the same: **one plan image per floor**, ideally clean line art on a white background.
***
## High accuracy: Matterport and other 3D scanners
This is the best result available, and by some distance. A Matterport capture does two jobs at once: it builds the immersive 360° space **and** produces a measured floor plan of the property from the same scan.
 ### How it works
Walk the property with the scanner (or a supported 360° camera), taking a sweep in every room and in the connecting spaces. The app stitches the sweeps into a single 3D model as you go.
Upload the capture. Processing happens in the cloud and gives you the 3D dollhouse and the walkthrough tour.
Schematic floor plans are ordered per property, as a paid add-on to the capture. You get a drawn plan per level, with room names and dimensions.
Download each level as an image or PDF. Those are the files you upload to your floors.
### Why it wins
* **Measured, not estimated.** Dimensions come from the scan geometry, so the areas on the plan match the ones in your listing.
* **One capture, two assets.** The same visit produces the plan *and* the 360° tour you can link from each room's **3D / 360° tour URL** field — see [Rooms](/build/rooms).
* **Multi-floor handled properly.** Levels are split for you, in the right order.
Because the capture also gives you a 360° tour, this route pairs naturally with the [Exterior](/build/exterior) 360° field and per-room tour links. A Visit with measured plans *and* 360° rooms is as complete as the product gets.
### The catch
* The hardware is the most expensive of the three options.
* Floor plans are billed per property on top of the subscription.
* Processing is not instant — plan the capture a day or two before you need the Visit live.
***
## Middle accuracy: a 360° camera
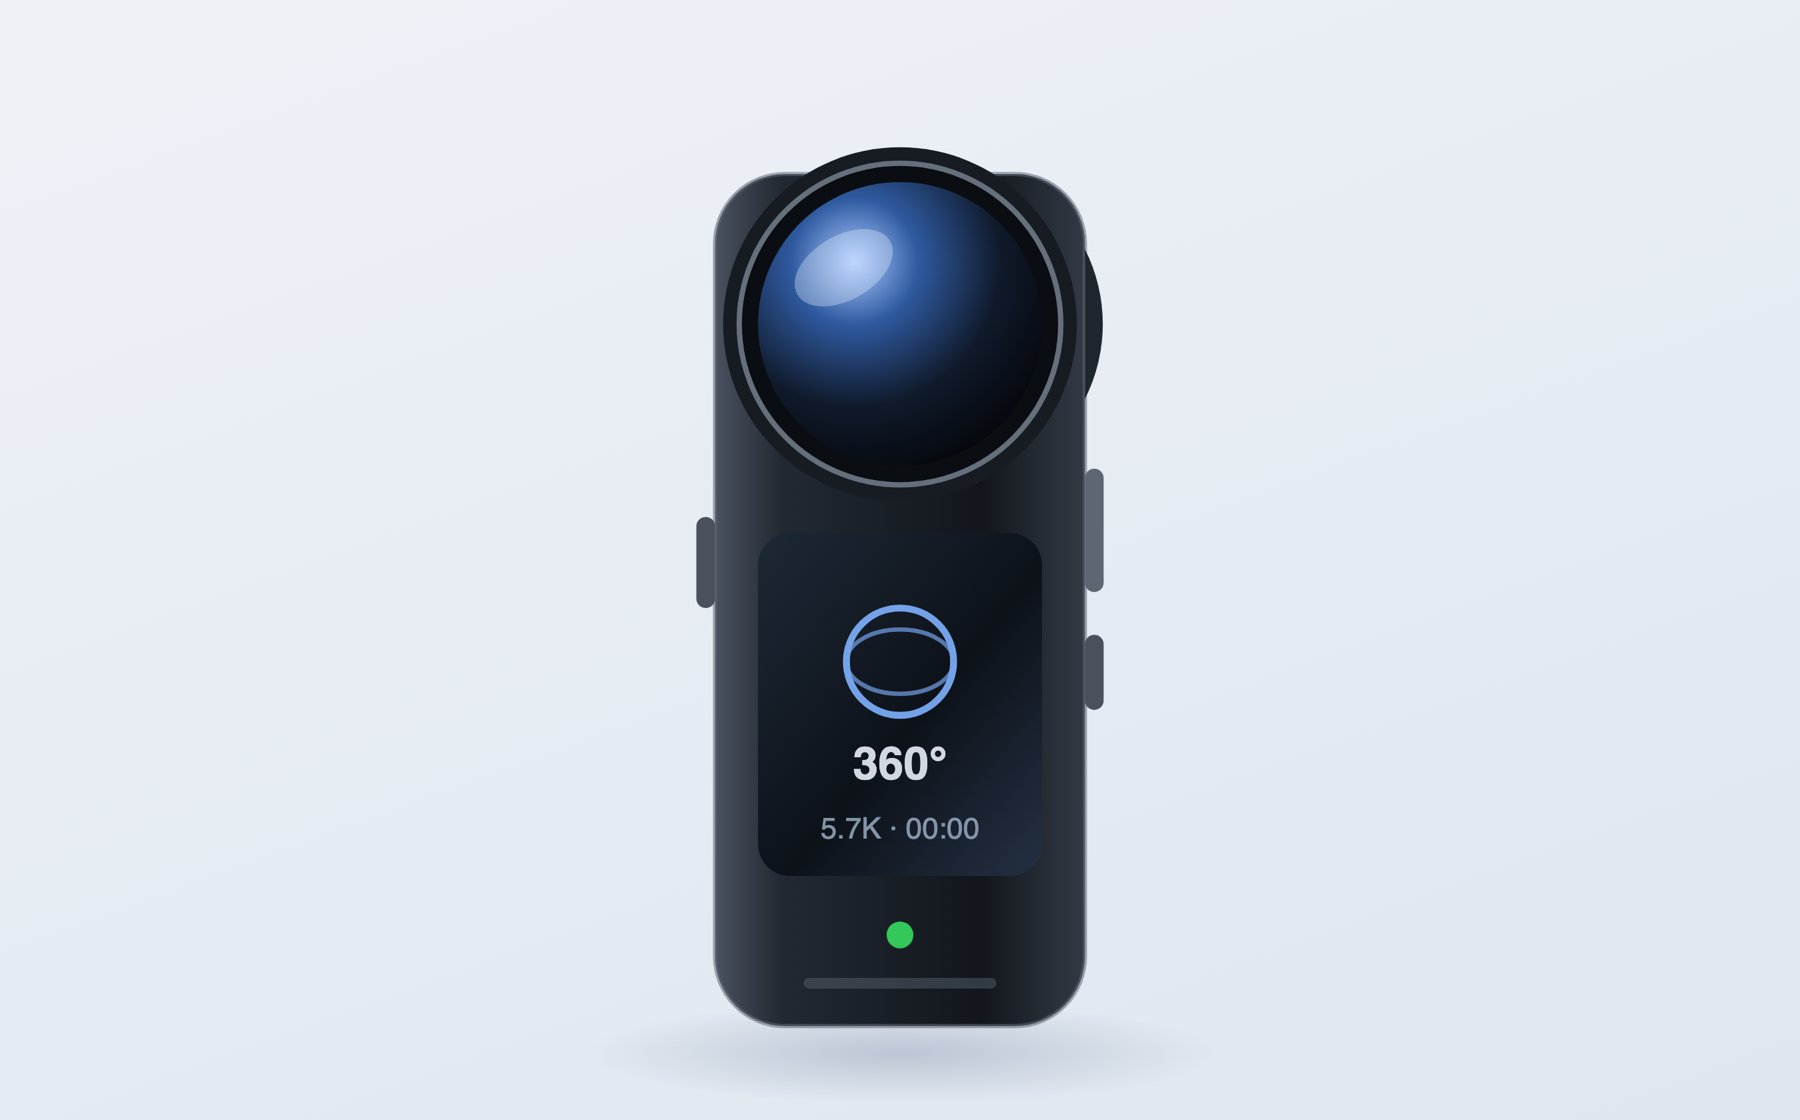
If you do not want to buy a dedicated scanner, a consumer 360° camera is the cheapest way into hardware capture. The **Insta360 X-series** is the usual pick: it is a fraction of the price of a professional rig, it fits in a jacket pocket, and it is supported as a capture device by the main 3D tour platforms.
### How it works
Walk the property with the scanner (or a supported 360° camera), taking a sweep in every room and in the connecting spaces. The app stitches the sweeps into a single 3D model as you go.
Upload the capture. Processing happens in the cloud and gives you the 3D dollhouse and the walkthrough tour.
Schematic floor plans are ordered per property, as a paid add-on to the capture. You get a drawn plan per level, with room names and dimensions.
Download each level as an image or PDF. Those are the files you upload to your floors.
### Why it wins
* **Measured, not estimated.** Dimensions come from the scan geometry, so the areas on the plan match the ones in your listing.
* **One capture, two assets.** The same visit produces the plan *and* the 360° tour you can link from each room's **3D / 360° tour URL** field — see [Rooms](/build/rooms).
* **Multi-floor handled properly.** Levels are split for you, in the right order.
Because the capture also gives you a 360° tour, this route pairs naturally with the [Exterior](/build/exterior) 360° field and per-room tour links. A Visit with measured plans *and* 360° rooms is as complete as the product gets.
### The catch
* The hardware is the most expensive of the three options.
* Floor plans are billed per property on top of the subscription.
* Processing is not instant — plan the capture a day or two before you need the Visit live.
***
## Middle accuracy: a 360° camera
If you do not want to buy a dedicated scanner, a consumer 360° camera is the cheapest way into hardware capture. The **Insta360 X-series** is the usual pick: it is a fraction of the price of a professional rig, it fits in a jacket pocket, and it is supported as a capture device by the main 3D tour platforms.
 ### The workflow
Put the camera on a tripod at roughly eye height in the middle of each room, step out of frame, and take one 360° shot. Include hallways and landings — the service needs them to connect rooms together.
Send the captures to the platform that generates the plan. The output is a drawn floor plan derived from the 360° imagery.
Check room shapes against reality and correct anything obviously wrong before you download. Small rooms, mirrors and glass are where these captures wander.
Export the plan per level and upload it to the matching floor in your Visit.
### Shooting tips
* **One shot per room, plus the corridors.** Missing a connecting space is the most common reason a plan comes back with rooms floating apart.
* **Tripod, always.** Hand-held captures tilt, and tilt turns into skewed walls.
* **Open interior doors** so the space reads as continuous.
* **Even light.** Draw sheer curtains against blown-out windows; turn every lamp on.
* **Tidy first.** Clutter along the walls confuses the geometry as much as it puts buyers off.
Accuracy sits between a professional scan and a phone scan. Treat the dimensions as indicative — if you publish areas on the listing, verify them against the title deed or a tape measure before you print them on the [plan caption](/build/floors).
***
## Free: the Planpoint Floorplan Scanner app
Our own [iOS app](https://apps.apple.com/app/id6792750233). You walk the property with your phone, it builds the plan on the device, and you can push the result straight onto a floor of a Visit without leaving the app.
### The workflow
Put the camera on a tripod at roughly eye height in the middle of each room, step out of frame, and take one 360° shot. Include hallways and landings — the service needs them to connect rooms together.
Send the captures to the platform that generates the plan. The output is a drawn floor plan derived from the 360° imagery.
Check room shapes against reality and correct anything obviously wrong before you download. Small rooms, mirrors and glass are where these captures wander.
Export the plan per level and upload it to the matching floor in your Visit.
### Shooting tips
* **One shot per room, plus the corridors.** Missing a connecting space is the most common reason a plan comes back with rooms floating apart.
* **Tripod, always.** Hand-held captures tilt, and tilt turns into skewed walls.
* **Open interior doors** so the space reads as continuous.
* **Even light.** Draw sheer curtains against blown-out windows; turn every lamp on.
* **Tidy first.** Clutter along the walls confuses the geometry as much as it puts buyers off.
Accuracy sits between a professional scan and a phone scan. Treat the dimensions as indicative — if you publish areas on the listing, verify them against the title deed or a tape measure before you print them on the [plan caption](/build/floors).
***
## Free: the Planpoint Floorplan Scanner app
Our own [iOS app](https://apps.apple.com/app/id6792750233). You walk the property with your phone, it builds the plan on the device, and you can push the result straight onto a floor of a Visit without leaving the app.
 ### What you need
* An **iPhone or iPad with a LiDAR sensor** — iPhone 12 Pro or newer Pro model, or a LiDAR iPad Pro
* **iOS 17** or later
* Your **Planpoint Visit account** — you sign in with the same email and password as the dashboard
Download the Planpoint [Floorplan Scanner app on the App Store](https://apps.apple.com/app/id6792750233).
### Scanning a property
The home screen lists your **Past scans**. **New scan** starts a fresh capture. The first time, a short **Creating a Floor Plan** guide walks you through the four phases.
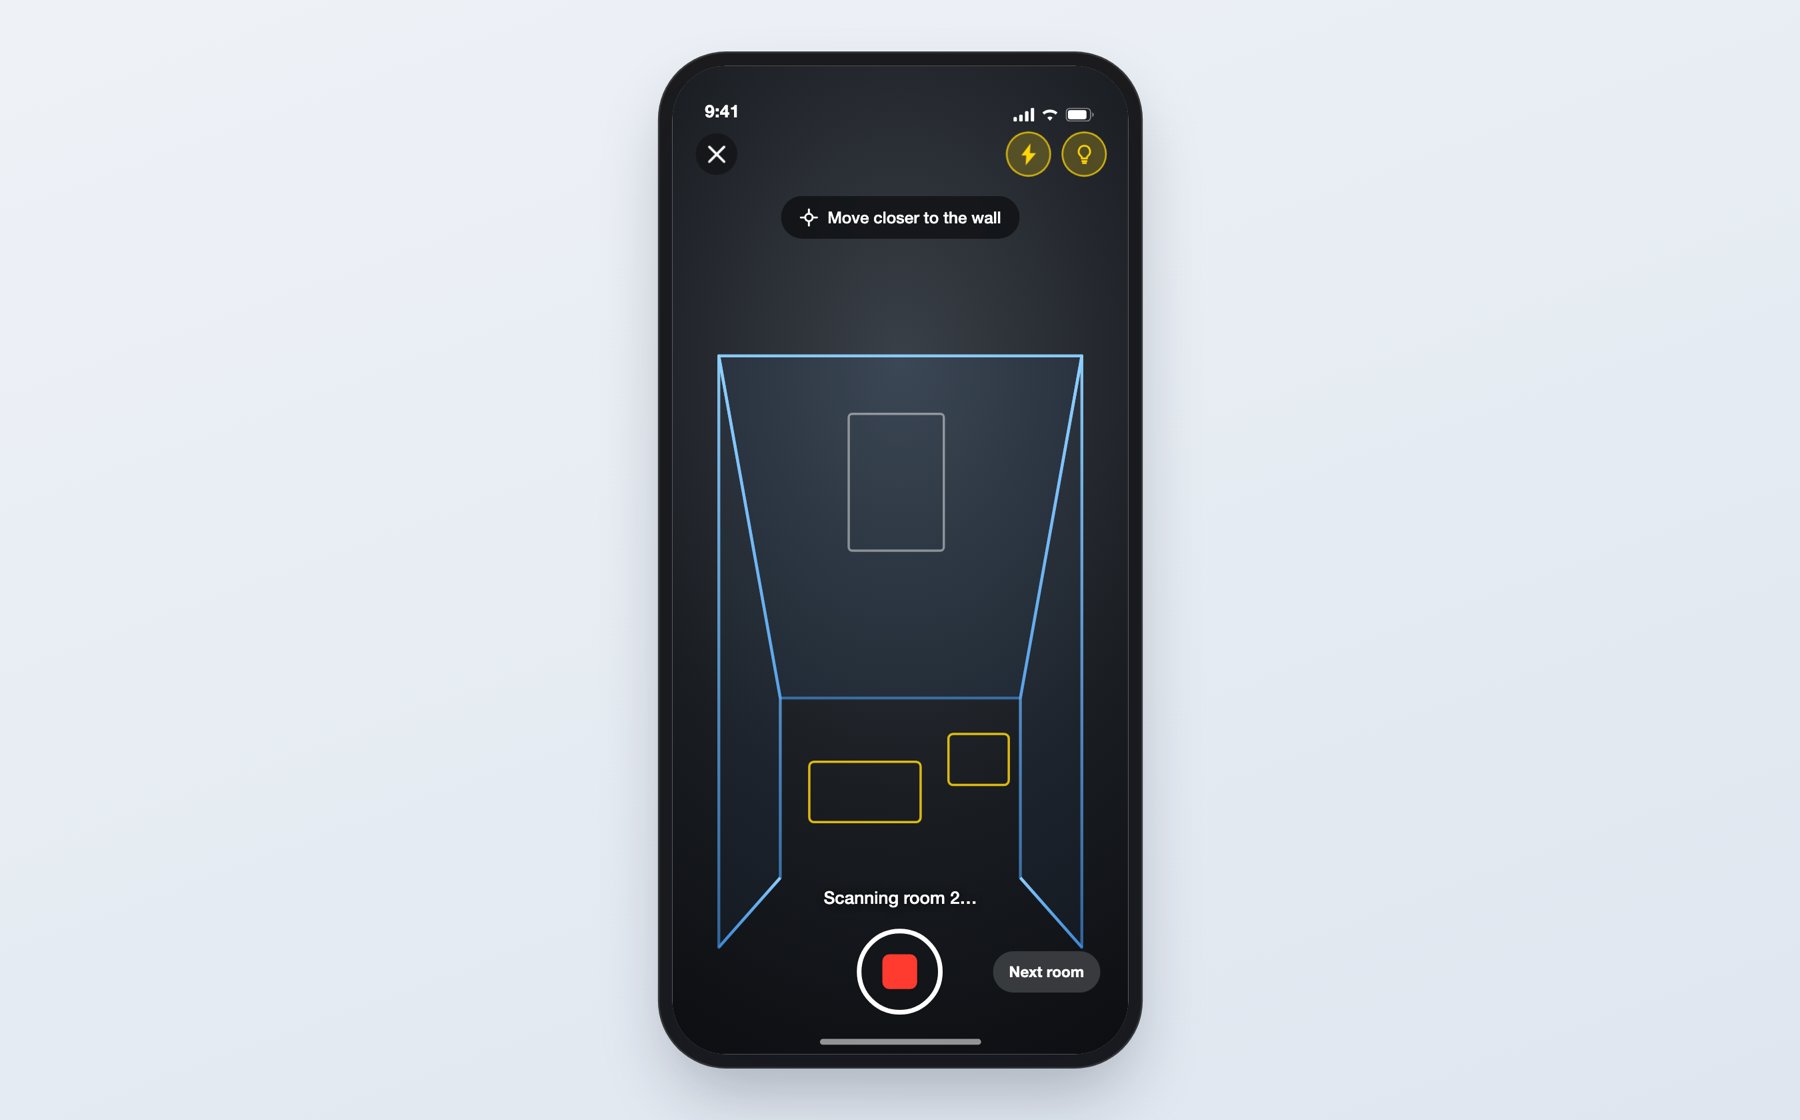
Point the device at the room and tap **Start scan**. Move slowly and sweep each wall from floor to ceiling. Walls, doors, windows and furniture appear as outlines as they are recognised.
Tap **Next room** to pause, walk to the next room, then **Resume**. Repeat for the whole level — the app merges the rooms into one plan.
Tap **Finish** when everything is captured. The app processes the scan on the device and opens the result.
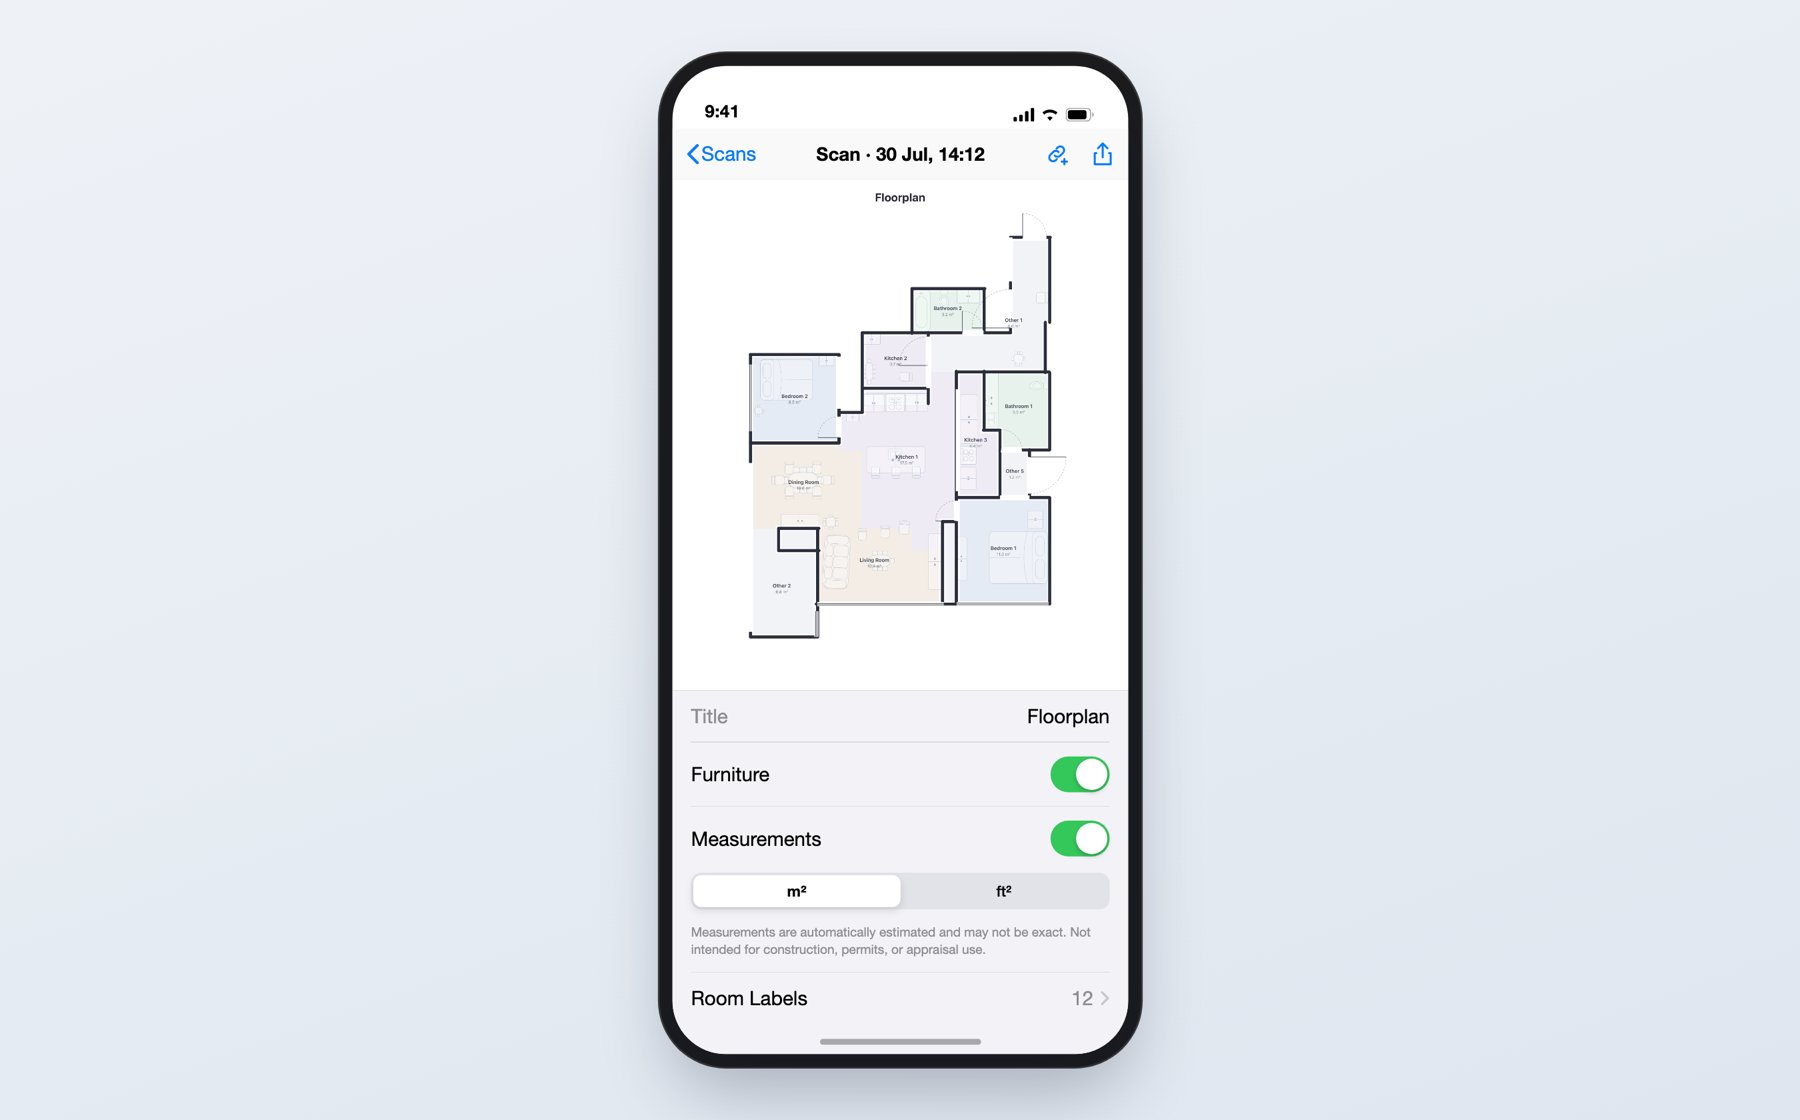
Set a **Title**, toggle **Furniture** and **Measurements**, pick **m²** or **ft²** under **Units**, and rename anything the app guessed wrong under **Room Labels**.
Tap **Link to a Planpoint property**, choose the property, then choose an existing floor — its plan image is replaced — or create a new floor.
### What you need
* An **iPhone or iPad with a LiDAR sensor** — iPhone 12 Pro or newer Pro model, or a LiDAR iPad Pro
* **iOS 17** or later
* Your **Planpoint Visit account** — you sign in with the same email and password as the dashboard
Download the Planpoint [Floorplan Scanner app on the App Store](https://apps.apple.com/app/id6792750233).
### Scanning a property
The home screen lists your **Past scans**. **New scan** starts a fresh capture. The first time, a short **Creating a Floor Plan** guide walks you through the four phases.
Point the device at the room and tap **Start scan**. Move slowly and sweep each wall from floor to ceiling. Walls, doors, windows and furniture appear as outlines as they are recognised.
Tap **Next room** to pause, walk to the next room, then **Resume**. Repeat for the whole level — the app merges the rooms into one plan.
Tap **Finish** when everything is captured. The app processes the scan on the device and opens the result.
Set a **Title**, toggle **Furniture** and **Measurements**, pick **m²** or **ft²** under **Units**, and rename anything the app guessed wrong under **Room Labels**.
Tap **Link to a Planpoint property**, choose the property, then choose an existing floor — its plan image is replaced — or create a new floor.
 ### Scanning tips
The app's own **Scanning tips** sheet, behind the lightbulb icon, comes down to three things:
* **Move slowly** — quick sweeps lose tracking
* **Sweep the whole wall** — floor to ceiling, corner to corner
* **Keep it well lit** — turn the lights on and use the flash button if the app suggests it
And two more from experience:
* **One level per scan.** Scan the ground floor, link it, then start a new scan for the next level.
* **Open the doors** before you start, so you can walk from room to room without breaking the capture.
### What you get out
| Output | Where it goes |
| --------------------------- | ---------------------------------------------------------------------------------------------- |
| 2D floor plan (PNG and PDF) | Straight onto a floor via **Link to a Planpoint property**, or out through the iOS share sheet |
| 3D model (USDZ) | Kept on the device — useful for a quick look, not used by the Visit |
Rooms smaller than about 1 m² are not labelled on the plan, and measurements come from the phone's sensors — accurate enough to sell from, not accurate enough to build from. Turn **Measurements** off if you would rather not publish numbers you cannot stand behind.
***
## Preparing the plan for your Visit
Whatever produced it, the plan behaves best in the viewer when it looks like this:
* **Line art on a white background.** Dark, photographic or heavily shaded plans lose their outlines on a phone.
* **One image per level**, cropped to the plan itself — no borders, no agency letterhead, no page margins.
* **Decent resolution.** Buyers zoom, and the [floor plan editor](/features/floorplan-editor) zooms further. The viewer scales down cleanly; it cannot invent detail.
* **Unfurnished, if you have the choice.** The editor exists so buyers can furnish it themselves — a plan that is already full of sofas gives them nothing to do.
* **Consistent orientation across floors.** Rotating the first floor relative to the ground floor makes the property impossible to read.
Go to **Content → Floors**, open the floor and set its **Floor plan image**. Fill in the **Area label** and the three plan caption lines while you are there — see [Floors](/build/floors).
With a plan in place you can draw the [room polygons](/build/rooms#polygon-on-the-floor-plan) and place [viewpoints](/build/viewpoints).
Open the public URL on a phone. If the room names on the plan are unreadable at that size, go back for a cleaner export before you share the link.
Replacing a plan image later does **not** move the polygons and viewpoints you traced on it. If the new plan is a different crop or scale, re-check every room on that floor.
## Which one should I use?
Matterport, or another professional scan. When a buyer is comparing €/m² across listings, the plan has to be measured, not estimated.
A 360° camera. One purchase, then a per-plan fee, and every capture also gives you a 360° tour to link from your rooms.
The Planpoint Floorplan Scanner. A two-bedroom apartment takes minutes to scan, and the plan lands on the floor without a file ever touching your desktop.
Use it. An architect's drawing beats every scan on this page — just crop it, check it is one image per level, and upload it.
### Scanning tips
The app's own **Scanning tips** sheet, behind the lightbulb icon, comes down to three things:
* **Move slowly** — quick sweeps lose tracking
* **Sweep the whole wall** — floor to ceiling, corner to corner
* **Keep it well lit** — turn the lights on and use the flash button if the app suggests it
And two more from experience:
* **One level per scan.** Scan the ground floor, link it, then start a new scan for the next level.
* **Open the doors** before you start, so you can walk from room to room without breaking the capture.
### What you get out
| Output | Where it goes |
| --------------------------- | ---------------------------------------------------------------------------------------------- |
| 2D floor plan (PNG and PDF) | Straight onto a floor via **Link to a Planpoint property**, or out through the iOS share sheet |
| 3D model (USDZ) | Kept on the device — useful for a quick look, not used by the Visit |
Rooms smaller than about 1 m² are not labelled on the plan, and measurements come from the phone's sensors — accurate enough to sell from, not accurate enough to build from. Turn **Measurements** off if you would rather not publish numbers you cannot stand behind.
***
## Preparing the plan for your Visit
Whatever produced it, the plan behaves best in the viewer when it looks like this:
* **Line art on a white background.** Dark, photographic or heavily shaded plans lose their outlines on a phone.
* **One image per level**, cropped to the plan itself — no borders, no agency letterhead, no page margins.
* **Decent resolution.** Buyers zoom, and the [floor plan editor](/features/floorplan-editor) zooms further. The viewer scales down cleanly; it cannot invent detail.
* **Unfurnished, if you have the choice.** The editor exists so buyers can furnish it themselves — a plan that is already full of sofas gives them nothing to do.
* **Consistent orientation across floors.** Rotating the first floor relative to the ground floor makes the property impossible to read.
Go to **Content → Floors**, open the floor and set its **Floor plan image**. Fill in the **Area label** and the three plan caption lines while you are there — see [Floors](/build/floors).
With a plan in place you can draw the [room polygons](/build/rooms#polygon-on-the-floor-plan) and place [viewpoints](/build/viewpoints).
Open the public URL on a phone. If the room names on the plan are unreadable at that size, go back for a cleaner export before you share the link.
Replacing a plan image later does **not** move the polygons and viewpoints you traced on it. If the new plan is a different crop or scale, re-check every room on that floor.
## Which one should I use?
Matterport, or another professional scan. When a buyer is comparing €/m² across listings, the plan has to be measured, not estimated.
A 360° camera. One purchase, then a per-plan fee, and every capture also gives you a 360° tour to link from your rooms.
The Planpoint Floorplan Scanner. A two-bedroom apartment takes minutes to scan, and the plan lands on the floor without a file ever touching your desktop.
Use it. An architect's drawing beats every scan on this page — just crop it, check it is one image per level, and upload it.