> ## Documentation Index
> Fetch the complete documentation index at: https://visitdocs.planpoint.io/llms.txt
> Use this file to discover all available pages before exploring further.
# Floors
> Add each level of the property, upload its floor plan and set the plan captions.
**Content → Floors** is the skeleton of the tour. Every room belongs to a floor, and every floor outline on the exterior photo points at one.
 ## Adding a floor
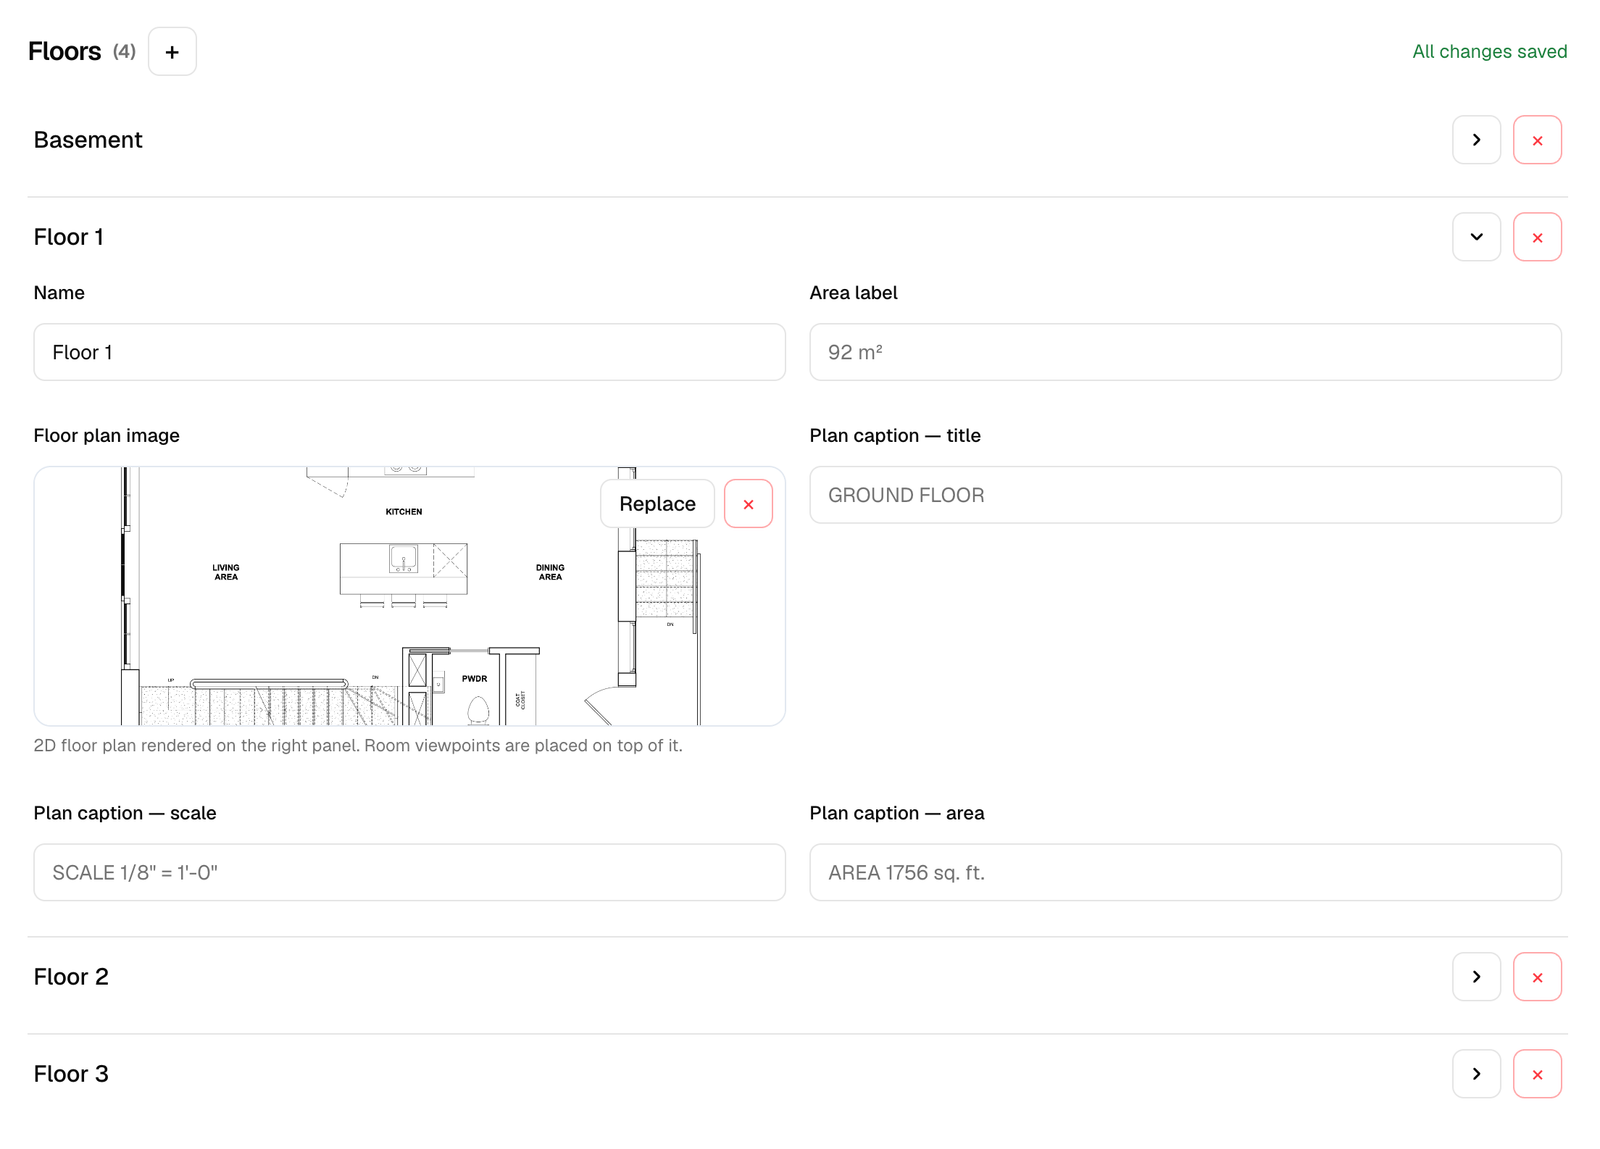
Click **+** to add a level, then fill in its fields. Floors are shown to buyers in the order they appear here, so add them in the order you want them browsed — usually bottom to top, or the way an agent would walk a client through the property.
## Floor fields
What buyers see in the floor selector and on room cards: `Ground floor`, `Second floor`, `Basement`. Use the names people actually say — the viewer never renames them to “Floor 1”.
Free text such as `92 m²` or `1,756 sq. ft.`, shown next to the floor.
The plan drawing for this level. Line-art plans on a white background look best and stay readable on a phone. Upload the plan at a decent resolution — the viewer scales it down, and buyers can zoom.
No plan for this property? See [Creating a floor plan](/build/floor-plans) for the three ways to produce one.
Three optional lines printed with the plan, mirroring an architect's title block: for example `GROUND FLOOR`, `SCALE 1/8" = 1'-0"` and `AREA 1756 sq. ft.`
Furniture is not something you place from the dashboard. Buyers furnish the plan themselves from the viewer (**Open Editor**), and their layout stays on their own device — see [Floor plan editor](/features/floorplan-editor).
## Order of operations
A floor only becomes clickable once it has an **outline on the exterior photo**. If you add a floor after tracing the others, go back to [Content → Exterior](/build/exterior#floor-outlines) and trace the new one.
A floor with no plan image still works — its rooms appear in the list — but the floor plan pane shows a **Missing floor plan** placeholder, and room polygons and viewpoints cannot be traced. If you do not have a plan, [make one](/build/floor-plans).
## Adding a floor
Click **+** to add a level, then fill in its fields. Floors are shown to buyers in the order they appear here, so add them in the order you want them browsed — usually bottom to top, or the way an agent would walk a client through the property.
## Floor fields
What buyers see in the floor selector and on room cards: `Ground floor`, `Second floor`, `Basement`. Use the names people actually say — the viewer never renames them to “Floor 1”.
Free text such as `92 m²` or `1,756 sq. ft.`, shown next to the floor.
The plan drawing for this level. Line-art plans on a white background look best and stay readable on a phone. Upload the plan at a decent resolution — the viewer scales it down, and buyers can zoom.
No plan for this property? See [Creating a floor plan](/build/floor-plans) for the three ways to produce one.
Three optional lines printed with the plan, mirroring an architect's title block: for example `GROUND FLOOR`, `SCALE 1/8" = 1'-0"` and `AREA 1756 sq. ft.`
Furniture is not something you place from the dashboard. Buyers furnish the plan themselves from the viewer (**Open Editor**), and their layout stays on their own device — see [Floor plan editor](/features/floorplan-editor).
## Order of operations
A floor only becomes clickable once it has an **outline on the exterior photo**. If you add a floor after tracing the others, go back to [Content → Exterior](/build/exterior#floor-outlines) and trace the new one.
A floor with no plan image still works — its rooms appear in the list — but the floor plan pane shows a **Missing floor plan** placeholder, and room polygons and viewpoints cannot be traced. If you do not have a plan, [make one](/build/floor-plans).