> ## Documentation Index
> Fetch the complete documentation index at: https://visitdocs.planpoint.io/llms.txt
> Use this file to discover all available pages before exploring further.
# Feature hotspots
> Pin clickable labels onto a room photo to call out appliances, finishes and upgrades.
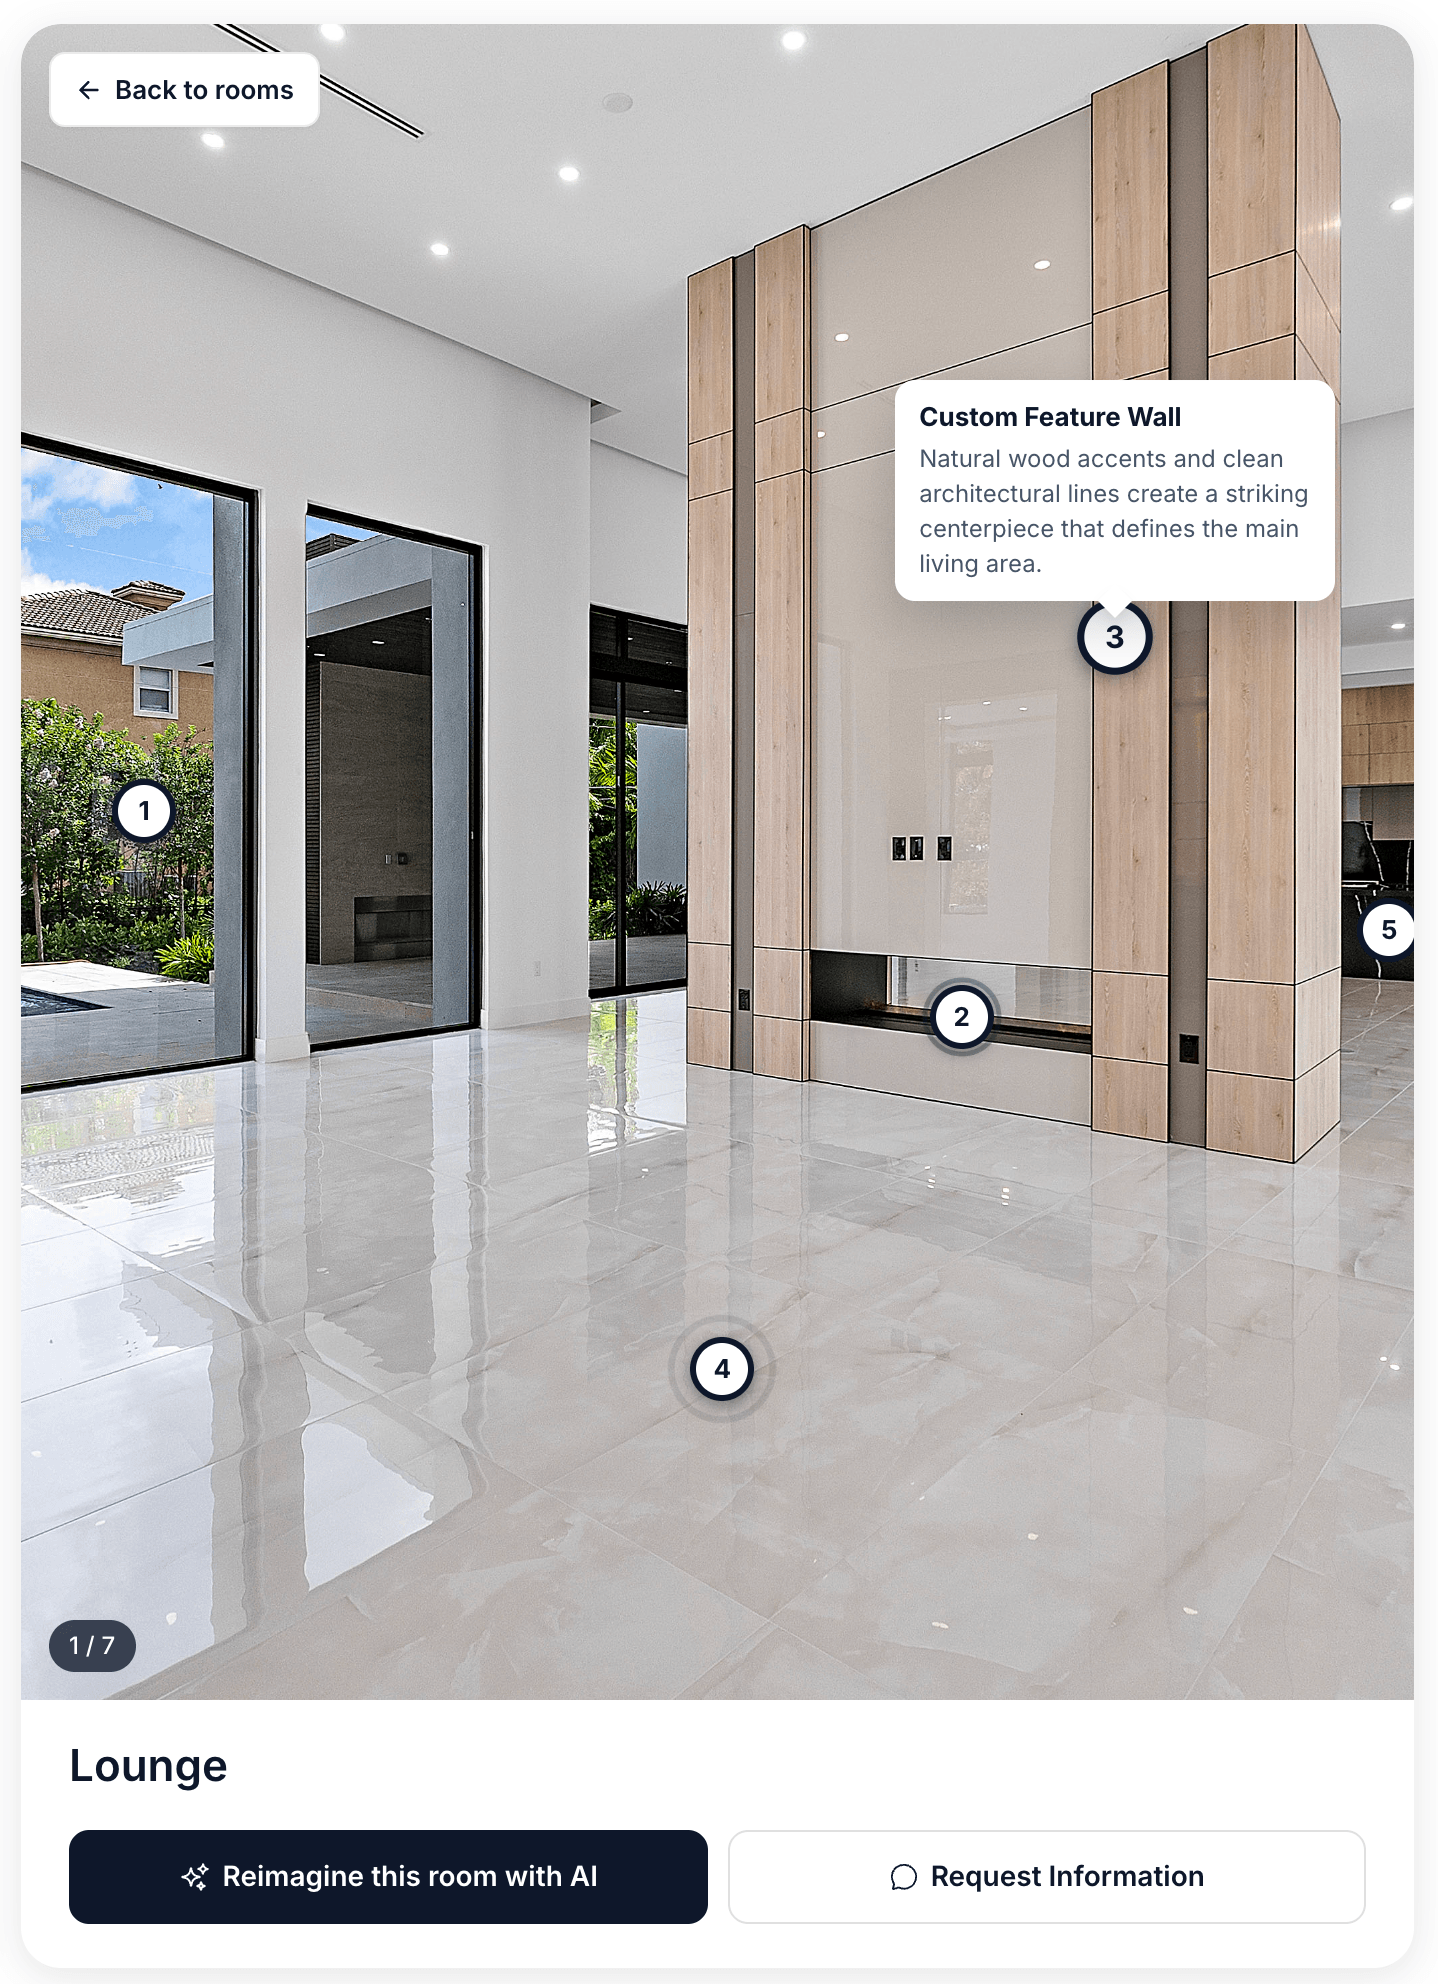
Feature hotspots are small pins placed directly on a room photo. Clicking one opens a card with a title and a short description — the digital version of an agent pointing at the oven and saying *“that's a Fulgar Milano”*.
 ## Adding hotspots
The hotspot editor sits directly under the **Room photo** field in **Content → Rooms**, and appears as soon as a photo is uploaded.
Click **Fullscreen** for precise placement — worth it on a detailed photo.
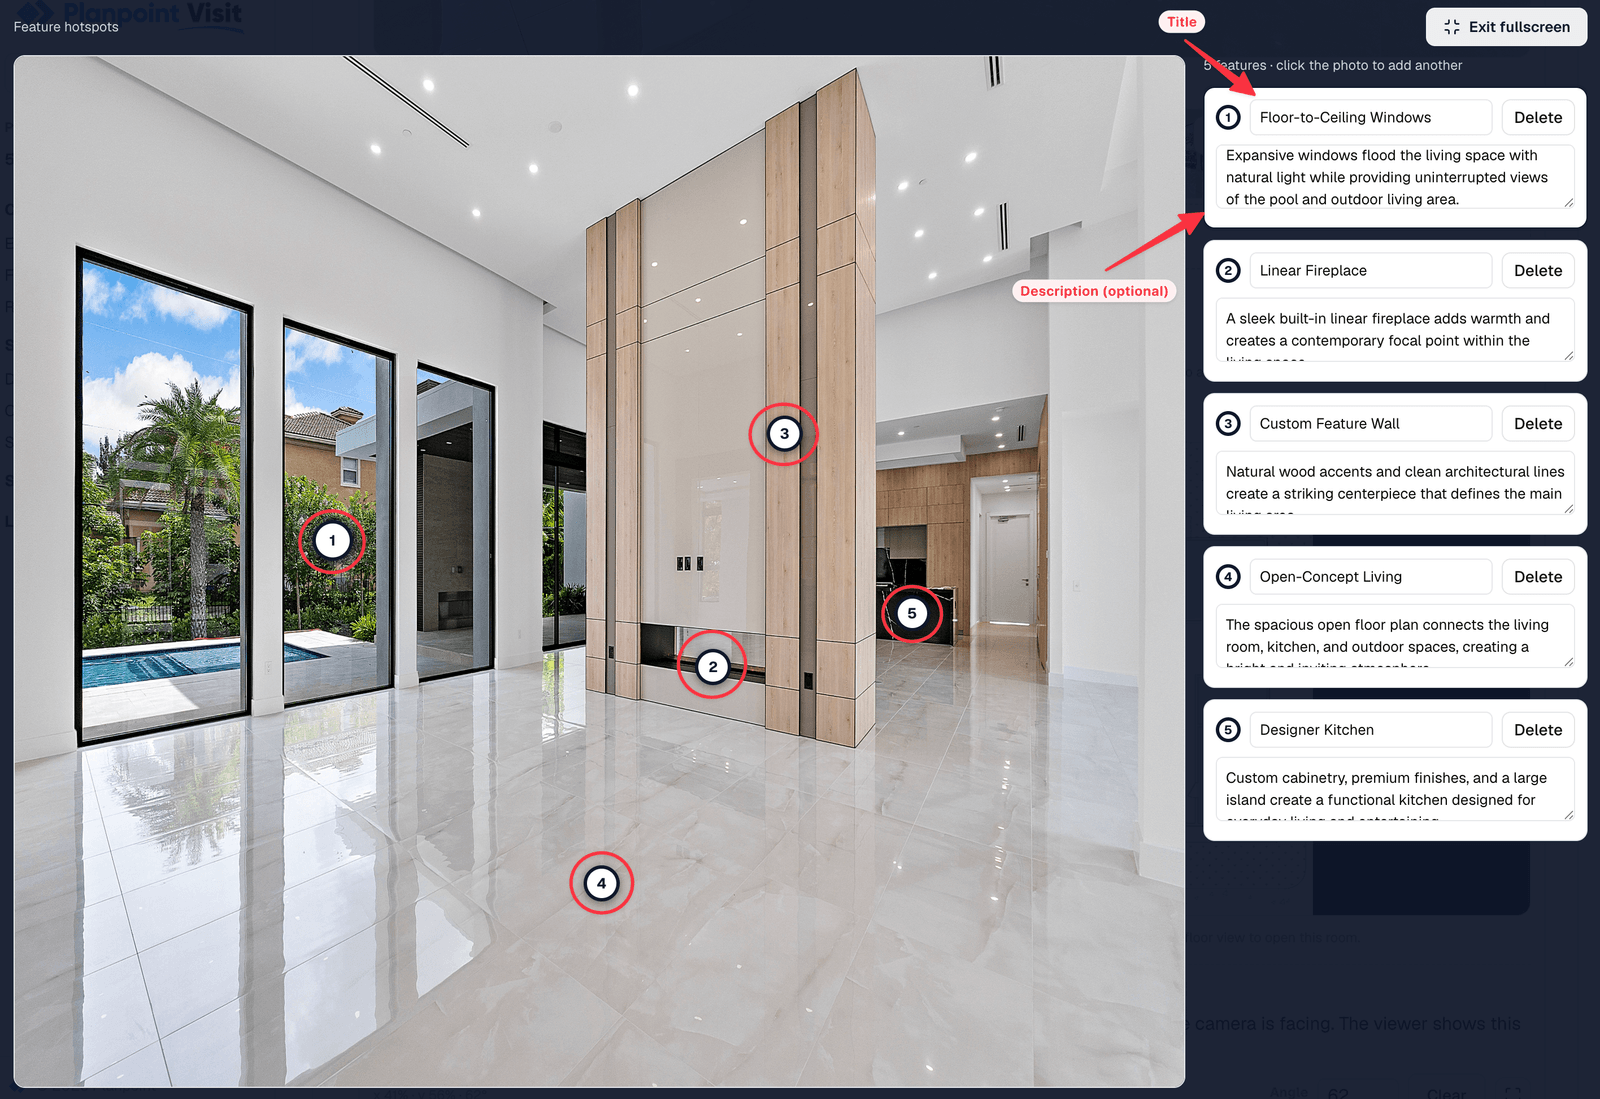
Click anywhere on the photo. A numbered pin is added and selected.
Fill in the **title** and, optionally, a **description** in the list next to the photo.
Drag a pin to move it. Use **Delete** in the list to remove one.
## Adding hotspots
The hotspot editor sits directly under the **Room photo** field in **Content → Rooms**, and appears as soon as a photo is uploaded.
Click **Fullscreen** for precise placement — worth it on a detailed photo.
Click anywhere on the photo. A numbered pin is added and selected.
Fill in the **title** and, optionally, a **description** in the list next to the photo.
Drag a pin to move it. Use **Delete** in the list to remove one.
 ## What makes a good hotspot
Hotspots earn their place when they answer a question a photo cannot:
* **Brands and appliances** — *Fulgar Milano oven*, *Miele induction hob*
* **Materials** — *Quartzite countertop*, *European oak flooring*
* **Recent work** — *Brand-new windows (2024)*, *Updated electrical panel*
* **Things that are easy to miss** — *Heated floor*, *Hidden pantry behind the panel*
Three to five hotspots per room is the sweet spot. Twenty pins turn a beautiful photo into a diagram.
## How they look
Hotspots automatically use the same accent colour as your viewpoint markers, but with a deliberately different shape — a **solid pin with a “+”** rather than the hollow ring used for viewpoints — so buyers read them as a different kind of information. The “+” turns into an “×” when the card is open.
Colours follow the **Accent** colour in the [style editor](/customize/colors); there is nothing to configure per hotspot.
Hotspot titles and descriptions are translatable — they appear in the [Translations](/features/languages) tab alongside your other content.
## Empty areas still work
The layer of pins never blocks the photo. Clicking anywhere that is not a pin still opens the photo fullscreen, exactly as it would without hotspots.
## What makes a good hotspot
Hotspots earn their place when they answer a question a photo cannot:
* **Brands and appliances** — *Fulgar Milano oven*, *Miele induction hob*
* **Materials** — *Quartzite countertop*, *European oak flooring*
* **Recent work** — *Brand-new windows (2024)*, *Updated electrical panel*
* **Things that are easy to miss** — *Heated floor*, *Hidden pantry behind the panel*
Three to five hotspots per room is the sweet spot. Twenty pins turn a beautiful photo into a diagram.
## How they look
Hotspots automatically use the same accent colour as your viewpoint markers, but with a deliberately different shape — a **solid pin with a “+”** rather than the hollow ring used for viewpoints — so buyers read them as a different kind of information. The “+” turns into an “×” when the card is open.
Colours follow the **Accent** colour in the [style editor](/customize/colors); there is nothing to configure per hotspot.
Hotspot titles and descriptions are translatable — they appear in the [Translations](/features/languages) tab alongside your other content.
## Empty areas still work
The layer of pins never blocks the photo. Clicking anywhere that is not a pin still opens the photo fullscreen, exactly as it would without hotspots.