> ## Documentation Index
> Fetch the complete documentation index at: https://visitdocs.planpoint.io/llms.txt
> Use this file to discover all available pages before exploring further.
# Rooms
> Add the rooms on each floor: name, area, orientation, photos and the polygon on the floor plan.
**Content → Rooms** is where most of your time goes. Rooms are grouped by floor: a row of floor tabs sits above the list, and you edit one floor at a time.
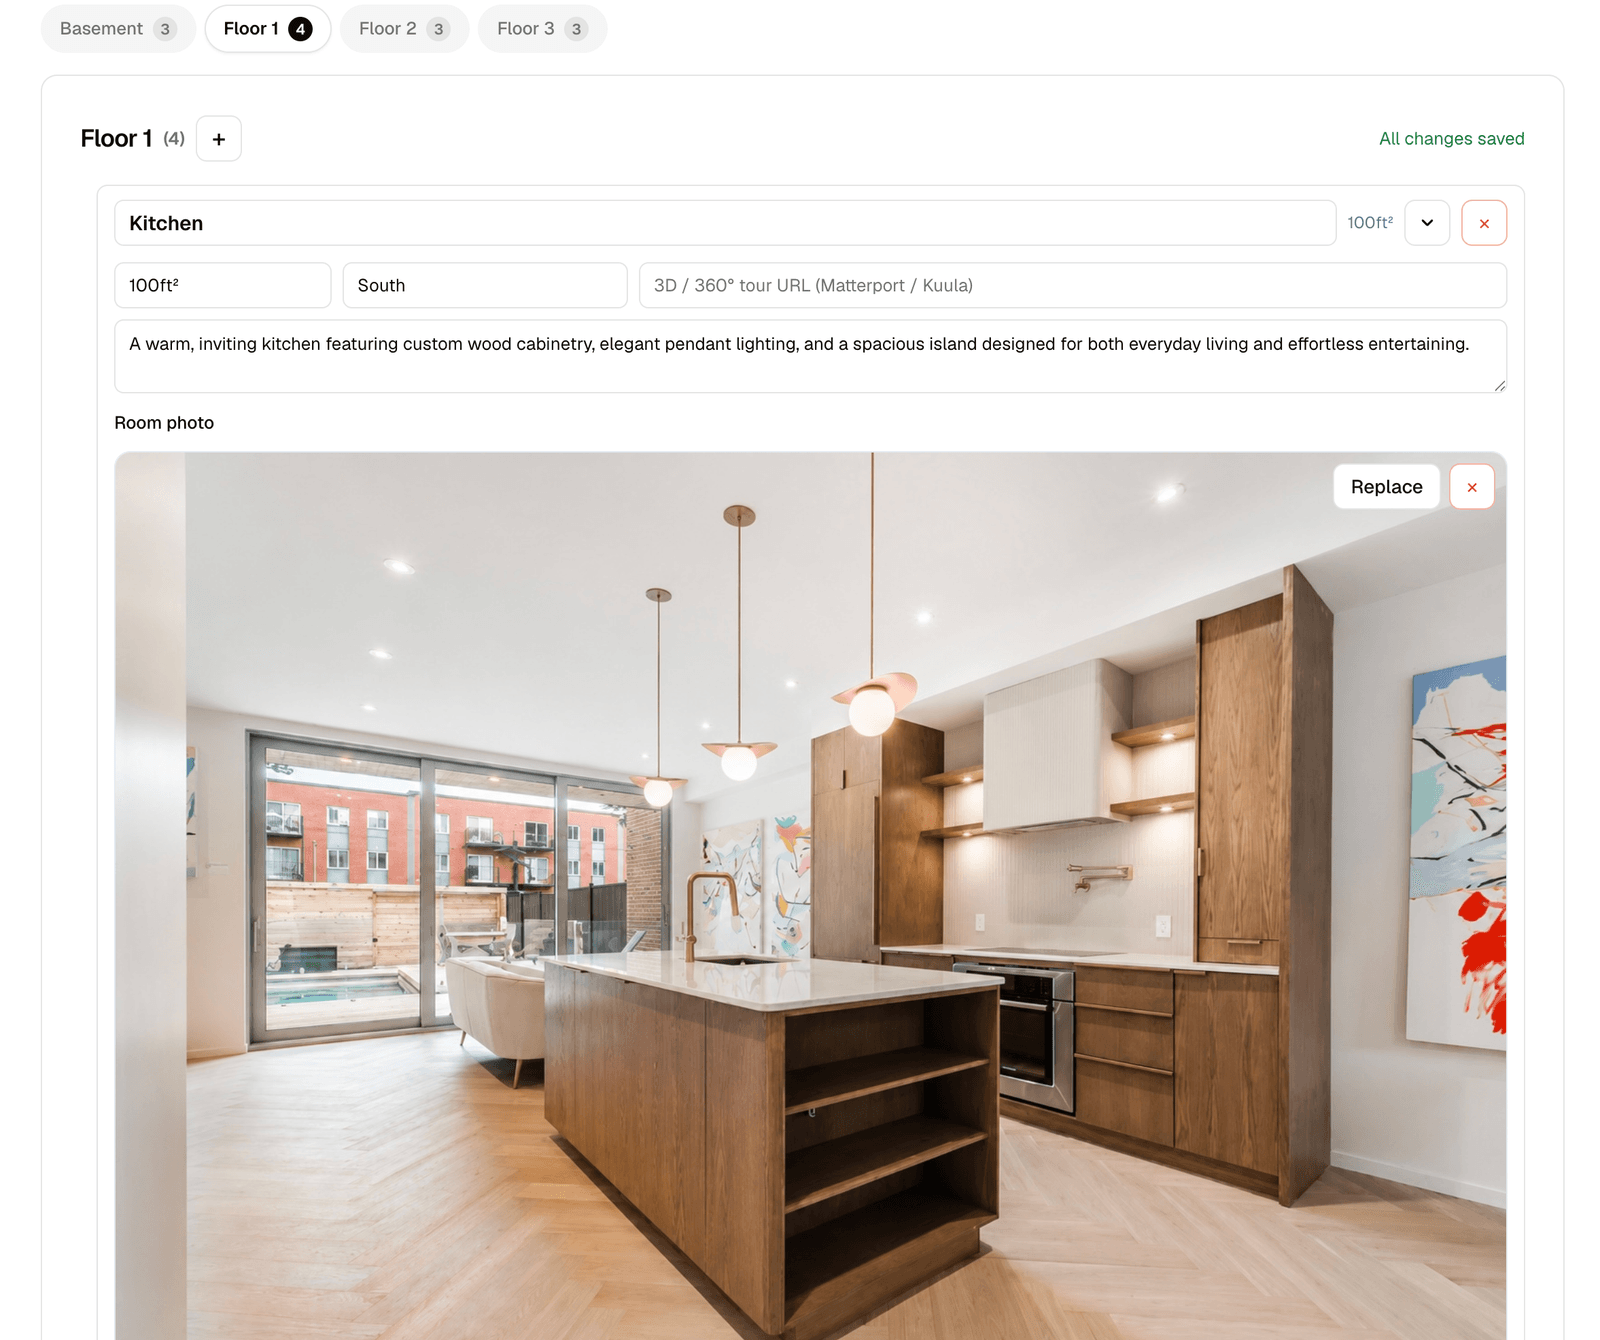 Each tab shows how many rooms that floor holds. An **Unassigned** tab appears only if a room has lost its floor.
## Adding a room
Click **+** in the header of the active floor. The new room appears at the end of the list, already expanded. Click its title to rename it — the title is editable inline whenever the room is open.
## Room fields
`Kitchen`, `Master bedroom`, `Walk-in closet`. Shown on the room card, on the floor plan label and in the browse list.
Free text — `300 ft²`, `28 m²`. Shown on the room card.
`South`, `North-west`, `Courtyard`. A small but surprisingly persuasive detail for buyers.
Paste a Matterport, Kuula or any other tour link. When it is set, the room shows a **3D Tour** action.
Optional. A sentence or two about the room — finishes, light, what it is used for.
The main photo, shown at a 3:2 ratio so it is not cropped awkwardly. This is the image used on the room card and as the base for [feature hotspots](/build/hotspots) and [AI reimagining](/features/reimagine).
Extra shots of the same room. They become a gallery under the main photo, and buyers can open any of them fullscreen.
## Polygon on the floor plan
Tracing the room on the plan is what links the list to the drawing. Once traced, the room highlights when hovered and is clickable directly on the plan.
Click **Draw polygon** (or **Edit polygon** if one already exists) under **Polygon on floor plan**. The editor opens fullscreen.
Click each corner, then click the first point again to close the shape. Hold Alt for clean right angles.
Use the disk icon in the toolbar. The editor closes automatically.
Each tab shows how many rooms that floor holds. An **Unassigned** tab appears only if a room has lost its floor.
## Adding a room
Click **+** in the header of the active floor. The new room appears at the end of the list, already expanded. Click its title to rename it — the title is editable inline whenever the room is open.
## Room fields
`Kitchen`, `Master bedroom`, `Walk-in closet`. Shown on the room card, on the floor plan label and in the browse list.
Free text — `300 ft²`, `28 m²`. Shown on the room card.
`South`, `North-west`, `Courtyard`. A small but surprisingly persuasive detail for buyers.
Paste a Matterport, Kuula or any other tour link. When it is set, the room shows a **3D Tour** action.
Optional. A sentence or two about the room — finishes, light, what it is used for.
The main photo, shown at a 3:2 ratio so it is not cropped awkwardly. This is the image used on the room card and as the base for [feature hotspots](/build/hotspots) and [AI reimagining](/features/reimagine).
Extra shots of the same room. They become a gallery under the main photo, and buyers can open any of them fullscreen.
## Polygon on the floor plan
Tracing the room on the plan is what links the list to the drawing. Once traced, the room highlights when hovered and is clickable directly on the plan.
Click **Draw polygon** (or **Edit polygon** if one already exists) under **Polygon on floor plan**. The editor opens fullscreen.
Click each corner, then click the first point again to close the shape. Hold Alt for clean right angles.
Use the disk icon in the toolbar. The editor closes automatically.
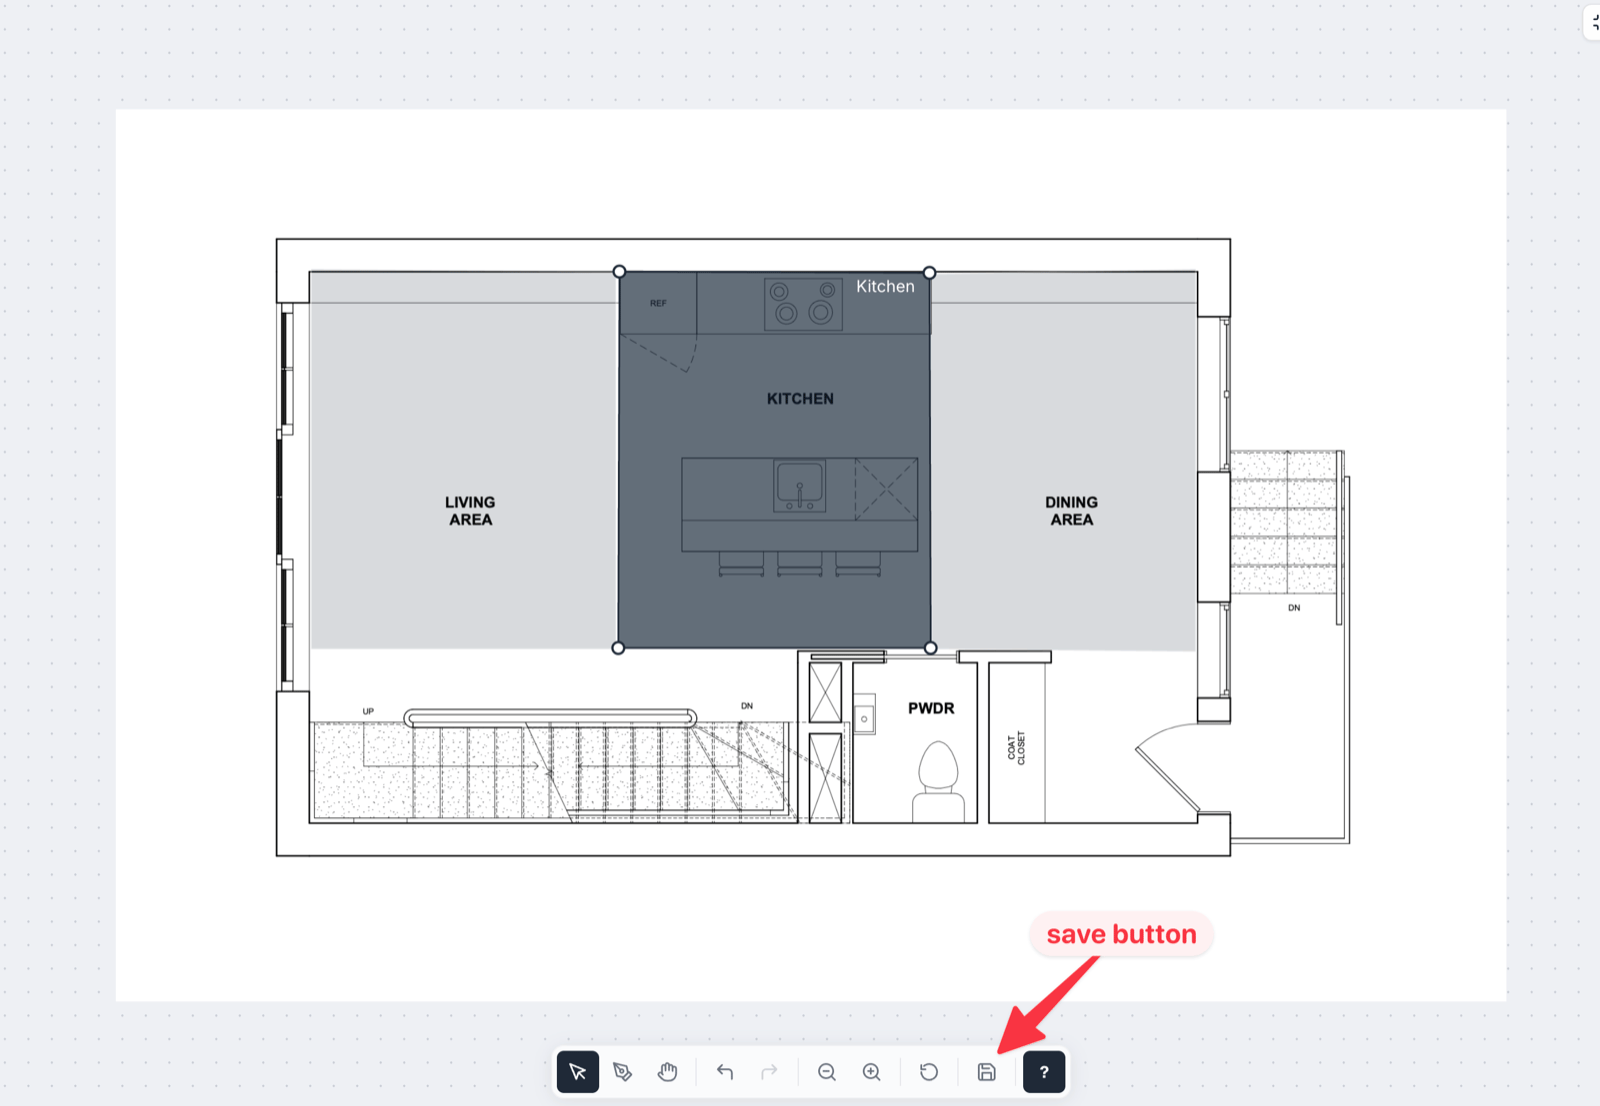 Neighbouring rooms are drawn faintly for reference, and snapping pulls your points onto their walls so shared walls line up exactly. Hold Shift while dragging a point to turn snapping off.
## Viewpoint
Each room can carry a viewpoint marker showing where its photo was taken and which way the camera pointed. See [Viewpoints](/build/viewpoints).
## Feature hotspots
Pin clickable labels onto the room photo to call out an appliance, a finish or an upgrade. See [Feature hotspots](/build/hotspots).
## Practical tips
* **Name rooms the way buyers think.** `Living room`, not `Space 04`.
* **Do not trace corridors** unless they matter — every extra shape is another thing to maintain.
* **One photo per room is enough to launch.** Extra photos can be added after the link is shared.
* **Rooms without a polygon still work.** They appear in the room list; they just are not clickable on the plan.
Neighbouring rooms are drawn faintly for reference, and snapping pulls your points onto their walls so shared walls line up exactly. Hold Shift while dragging a point to turn snapping off.
## Viewpoint
Each room can carry a viewpoint marker showing where its photo was taken and which way the camera pointed. See [Viewpoints](/build/viewpoints).
## Feature hotspots
Pin clickable labels onto the room photo to call out an appliance, a finish or an upgrade. See [Feature hotspots](/build/hotspots).
## Practical tips
* **Name rooms the way buyers think.** `Living room`, not `Space 04`.
* **Do not trace corridors** unless they matter — every extra shape is another thing to maintain.
* **One photo per room is enough to launch.** Extra photos can be added after the link is shared.
* **Rooms without a polygon still work.** They appear in the room list; they just are not clickable on the plan.