> ## Documentation Index
> Fetch the complete documentation index at: https://visitdocs.planpoint.io/llms.txt
> Use this file to discover all available pages before exploring further.
# Viewpoints
> Show buyers exactly where each photo was taken and which way the camera was pointing.
A viewpoint is a marker on the floor plan with a **direction cone**. It answers the question every buyer asks when they look at a photo: *where in the home am I, and what am I looking at?*
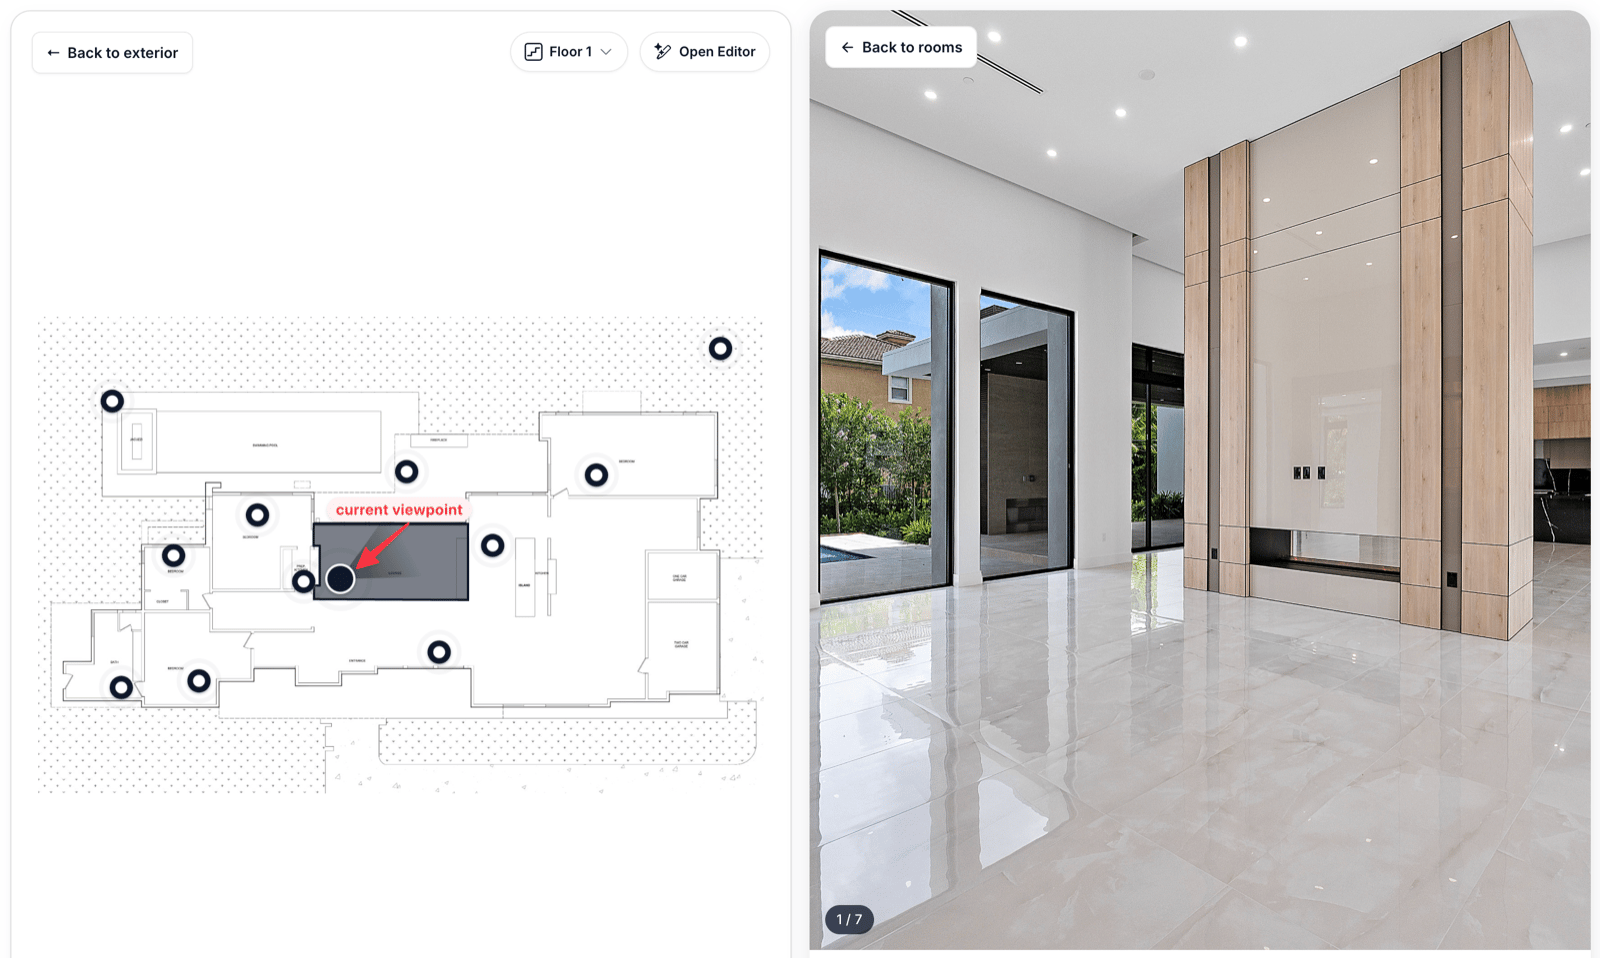 ## Two kinds of viewpoint
Where the outside photo was taken. Set once, shared by every floor.
Where each room photo was taken. Set per room, in the room's editor.
## Setting a viewpoint
Open the room in **Content → Rooms** and scroll to the viewpoint editor under the polygon field.
Drag the dot to the spot on the plan where the camera stood.
Drag the handle, or type the **Angle** in degrees. `0` points up the plan, and the angle increases clockwise.
## Two kinds of viewpoint
Where the outside photo was taken. Set once, shared by every floor.
Where each room photo was taken. Set per room, in the room's editor.
## Setting a viewpoint
Open the room in **Content → Rooms** and scroll to the viewpoint editor under the polygon field.
Drag the dot to the spot on the plan where the camera stood.
Drag the handle, or type the **Angle** in degrees. `0` points up the plan, and the angle increases clockwise.
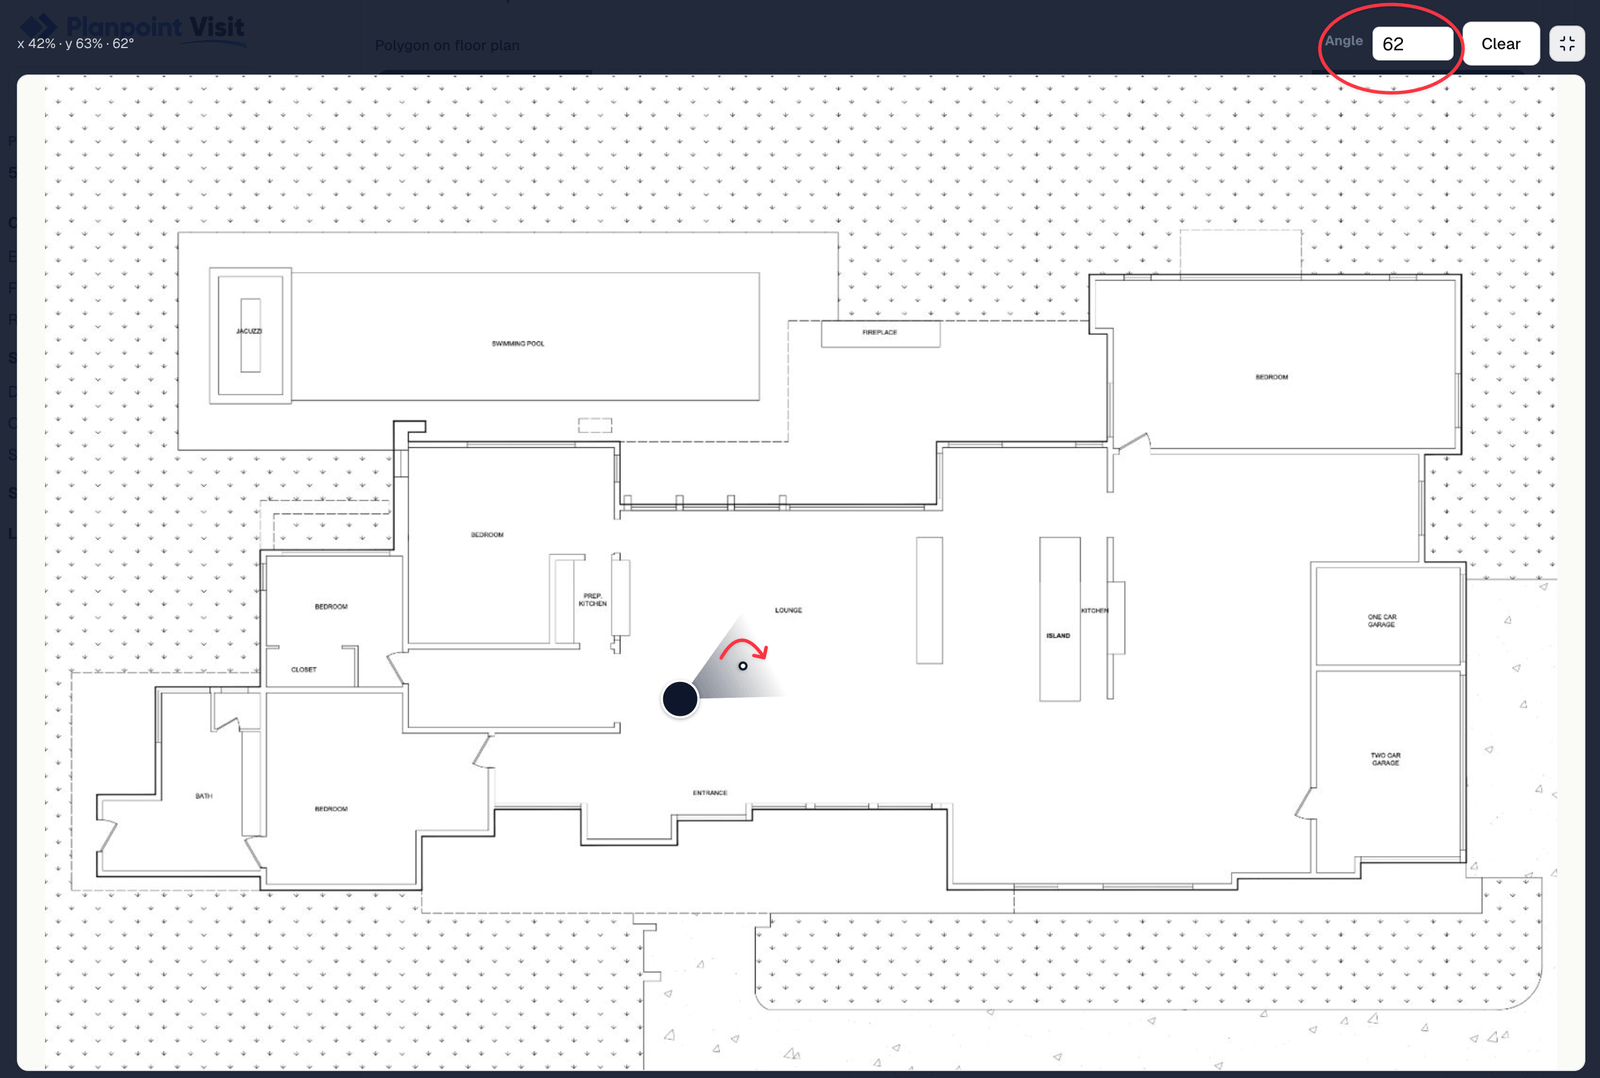 The marker is deliberately small in the editor — it is a placement aid, not a preview. How big it looks to buyers is controlled globally by **Viewpoint size** in the [style editor](/customize/style-editor).
## Size and thumbnails
Two global settings, both in **Settings → Customization → Customize → Theme**:
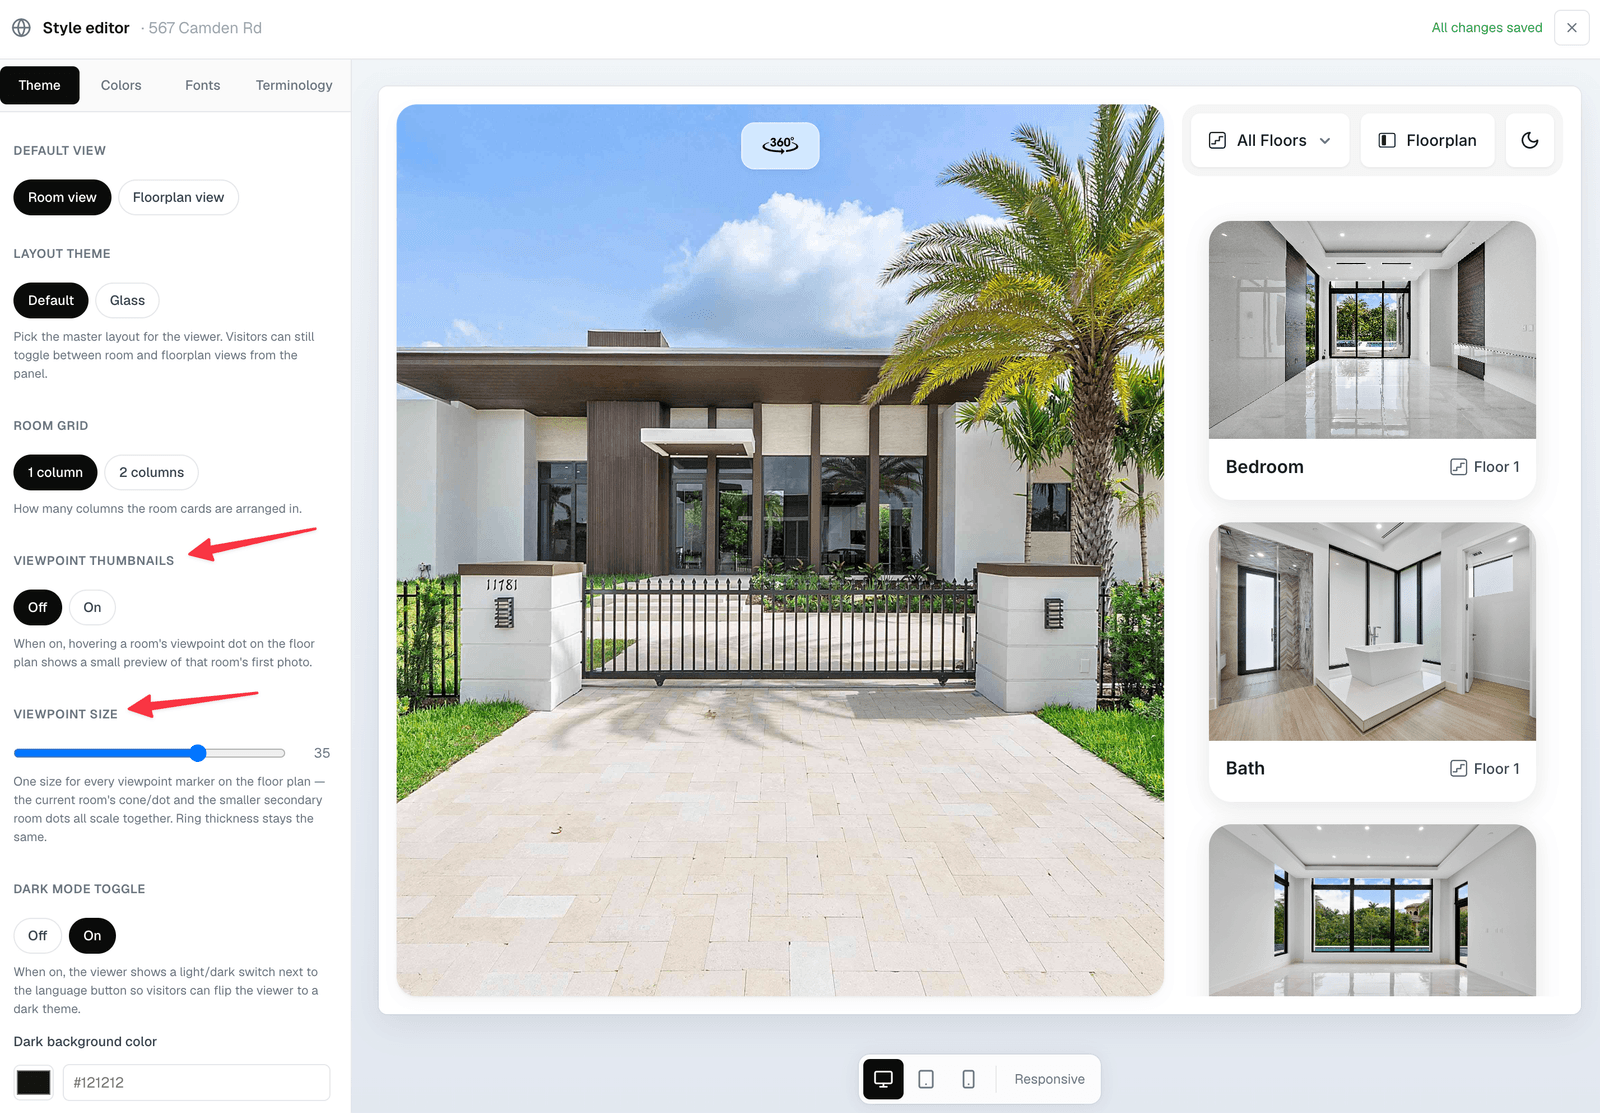
* **Viewpoint size** — one slider for the whole property. Every marker scales together, so no floor ends up with bigger dots than another.
* **Viewpoint thumbnails** — when on, hovering a marker pops up a small preview of that room's photo, placed on the opposite side of the cone so it never hides the direction.
The marker is deliberately small in the editor — it is a placement aid, not a preview. How big it looks to buyers is controlled globally by **Viewpoint size** in the [style editor](/customize/style-editor).
## Size and thumbnails
Two global settings, both in **Settings → Customization → Customize → Theme**:
* **Viewpoint size** — one slider for the whole property. Every marker scales together, so no floor ends up with bigger dots than another.
* **Viewpoint thumbnails** — when on, hovering a marker pops up a small preview of that room's photo, placed on the opposite side of the cone so it never hides the direction.
 ## Why they matter
* Buyers stop guessing which wall a photo is showing.
* The marker glides from room to room as they browse, which reads as movement through the home.
* Rooms without a photo still get a marker, so the plan does not feel half-finished.
If a photo was taken from a doorway, put the marker **in the doorway**, not in the middle of the room. Accuracy here is what makes the plan feel trustworthy.
## Why they matter
* Buyers stop guessing which wall a photo is showing.
* The marker glides from room to room as they browse, which reads as movement through the home.
* Rooms without a photo still get a marker, so the plan does not feel half-finished.
If a photo was taken from a doorway, put the marker **in the doorway**, not in the middle of the room. Accuracy here is what makes the plan feel trustworthy.