> ## Documentation Index
> Fetch the complete documentation index at: https://visitdocs.planpoint.io/llms.txt
> Use this file to discover all available pages before exploring further.
# What buyers see
> A screen-by-screen walkthrough of the public viewer, so you know what you are building towards.
The public viewer is a two-pane experience: **media on the left, navigation on the right**. On phones the two panes stack, with the photo on top and the list underneath.
## 1. The exterior
The tour opens on the exterior photo. The floor outlines you traced light up on hover, and a single click (or tap) enters that floor.
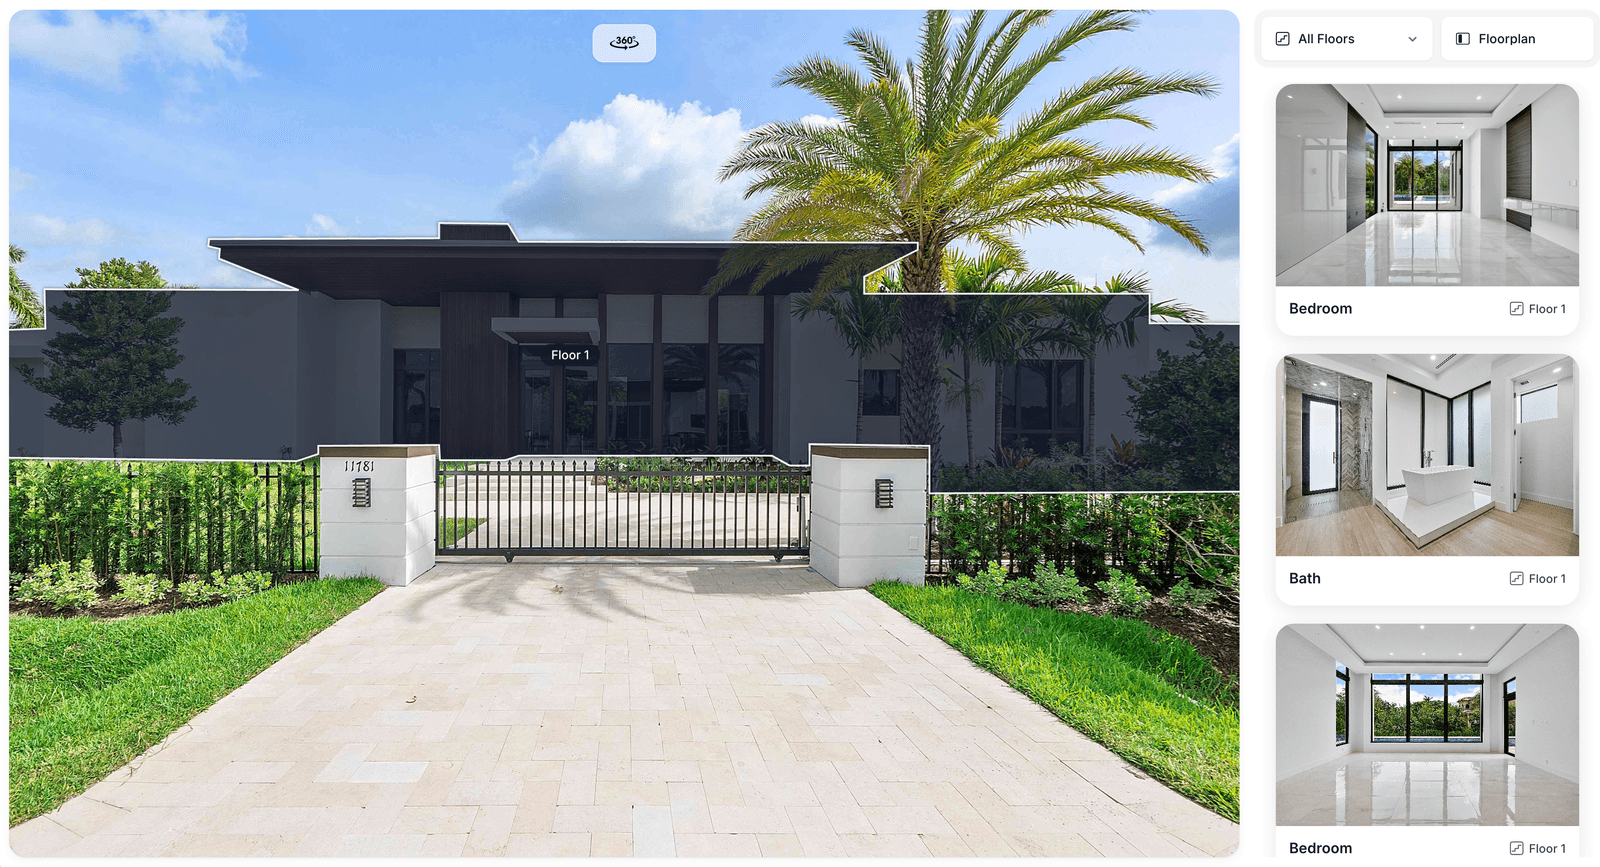 If you uploaded more than one exterior photo, arrows appear so visitors can turn around the building. On mobile, the floors highlight themselves one after another when the tour opens, so it is obvious the photo is interactive.
## 2. The browse panel
The right pane is the buyer's control centre:
* **Floors** — filter the list to one level or show every room.
* **Floorplan / Rooms** — a single toggle that swaps the right pane between the room cards and the floor plan.
* **Language** — a round flag button, shown only when you offer more than one language.
* **Light / dark** — shown only if you enable the dark-mode toggle.
* **⋮** — extra actions on small screens, including **Panorama**.
If you uploaded more than one exterior photo, arrows appear so visitors can turn around the building. On mobile, the floors highlight themselves one after another when the tour opens, so it is obvious the photo is interactive.
## 2. The browse panel
The right pane is the buyer's control centre:
* **Floors** — filter the list to one level or show every room.
* **Floorplan / Rooms** — a single toggle that swaps the right pane between the room cards and the floor plan.
* **Language** — a round flag button, shown only when you offer more than one language.
* **Light / dark** — shown only if you enable the dark-mode toggle.
* **⋮** — extra actions on small screens, including **Panorama**.
 Under the filters is the room list. Each card shows the room photo, its name, floor, area and orientation.
## 3. Floor plan view
Choosing a floor — or switching the toggle to **Floorplan** — shows the plan. Every room you traced becomes a clickable shape, and every room with a viewpoint gets a marker showing where the photo was taken and which way the camera was pointing.
Under the filters is the room list. Each card shows the room photo, its name, floor, area and orientation.
## 3. Floor plan view
Choosing a floor — or switching the toggle to **Floorplan** — shows the plan. Every room you traced becomes a clickable shape, and every room with a viewpoint gets a marker showing where the photo was taken and which way the camera was pointing.
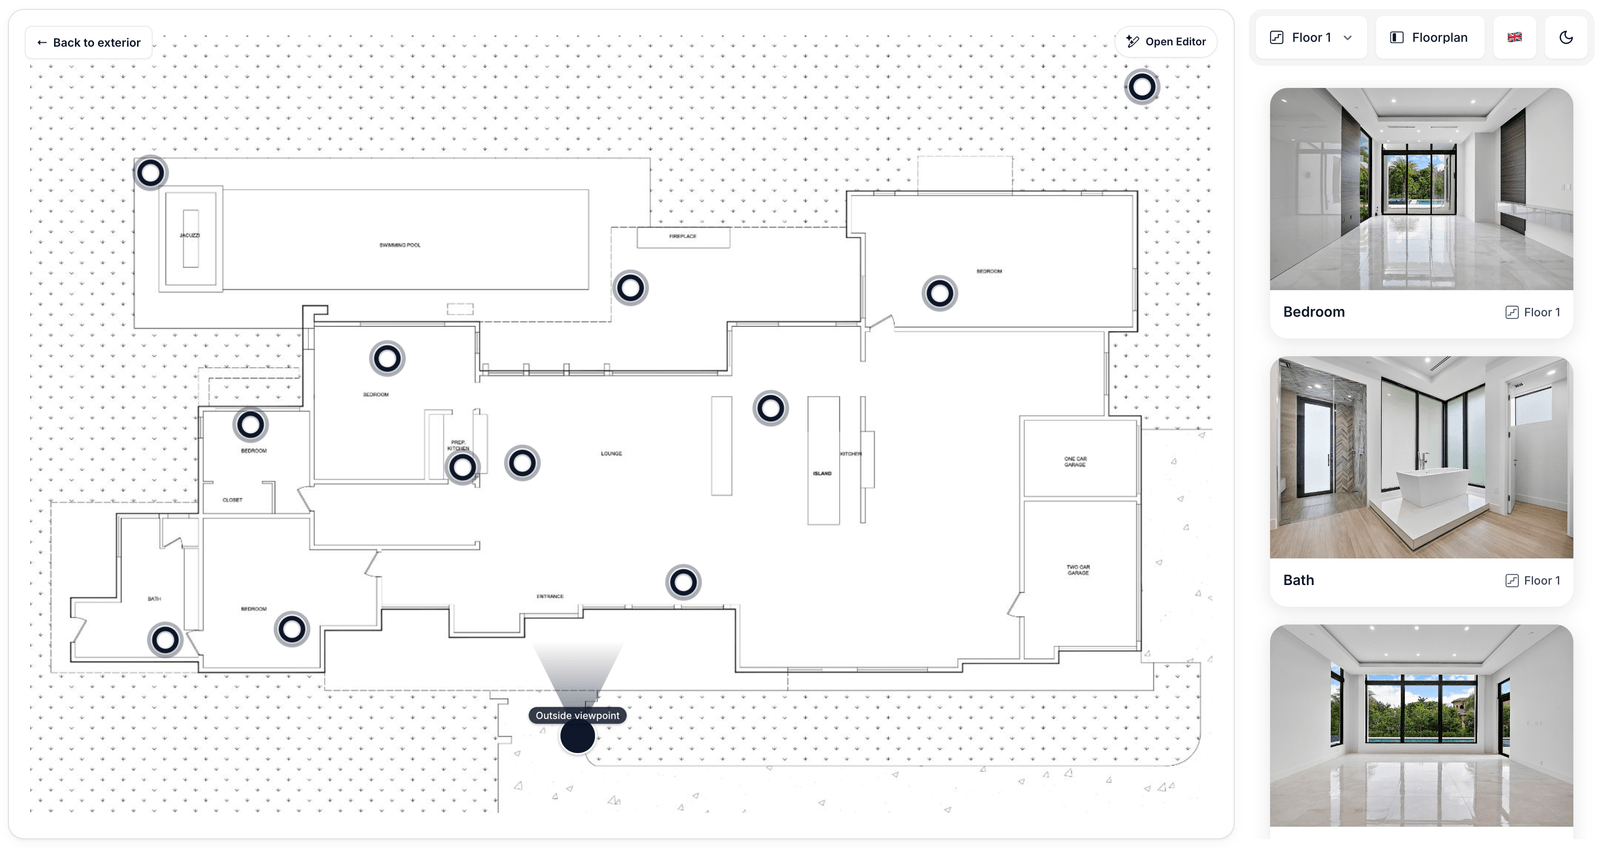 Top-left is **Back to exterior**. Top-right is a small toolbar with the **floor selector** and **Open Editor**, which launches the [floor plan editor](/features/floorplan-editor).
Hovering a viewpoint marker can pop up a thumbnail of that room's photo. It is off by default — turn it on with **Viewpoint thumbnails** in the [style editor](/customize/style-editor).
## 4. Room view
Opening a room shows its photo gallery on one side and the floor plan on the other, with the current viewpoint highlighted so the buyer always knows where they are standing.
Top-left is **Back to exterior**. Top-right is a small toolbar with the **floor selector** and **Open Editor**, which launches the [floor plan editor](/features/floorplan-editor).
Hovering a viewpoint marker can pop up a thumbnail of that room's photo. It is off by default — turn it on with **Viewpoint thumbnails** in the [style editor](/customize/style-editor).
## 4. Room view
Opening a room shows its photo gallery on one side and the floor plan on the other, with the current viewpoint highlighted so the buyer always knows where they are standing.
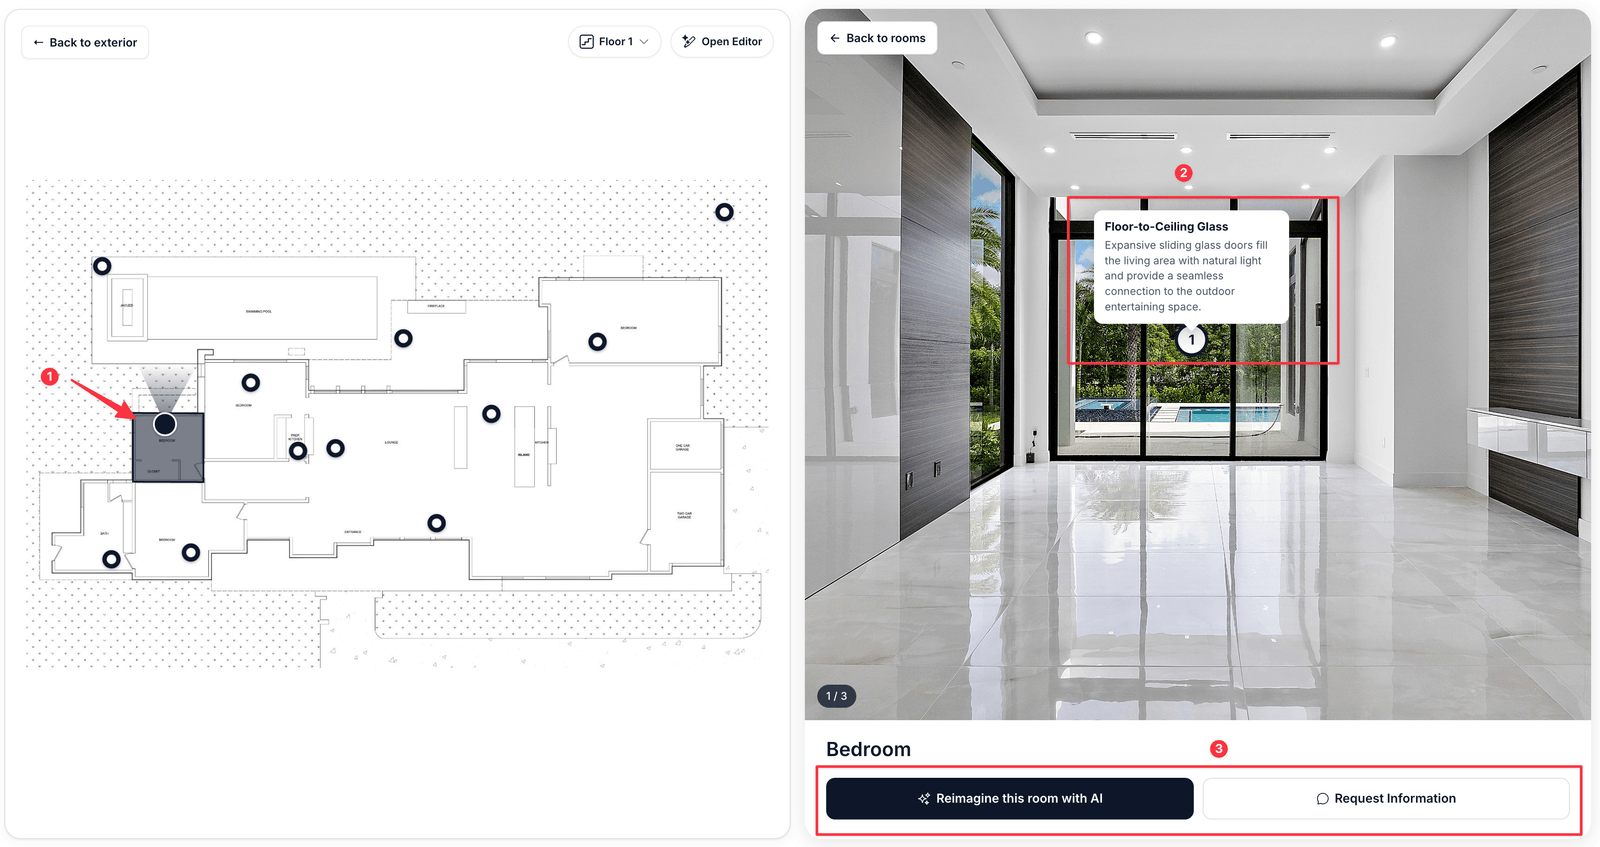 From here a buyer can:
* Click any photo to open it fullscreen.
* Click a **feature hotspot** to read about a specific fitting or finish.
* **Reimagine this room with AI** — restyle the photo from a text prompt.
* **Request Information** — send you their details (only when the [form](/features/forms) is enabled).
## 5. Extras
A full-bleed landscape mode for phones and tablets.
When the property belongs to a portfolio map, buyers can browse the whole portfolio.
From here a buyer can:
* Click any photo to open it fullscreen.
* Click a **feature hotspot** to read about a specific fitting or finish.
* **Reimagine this room with AI** — restyle the photo from a text prompt.
* **Request Information** — send you their details (only when the [form](/features/forms) is enabled).
## 5. Extras
A full-bleed landscape mode for phones and tablets.
When the property belongs to a portfolio map, buyers can browse the whole portfolio.