

Exterior image
Upload the main photo of the property. Choose a shot where the storeys you want to make clickable are clearly visible — a straight-on facade works better than a dramatic angle.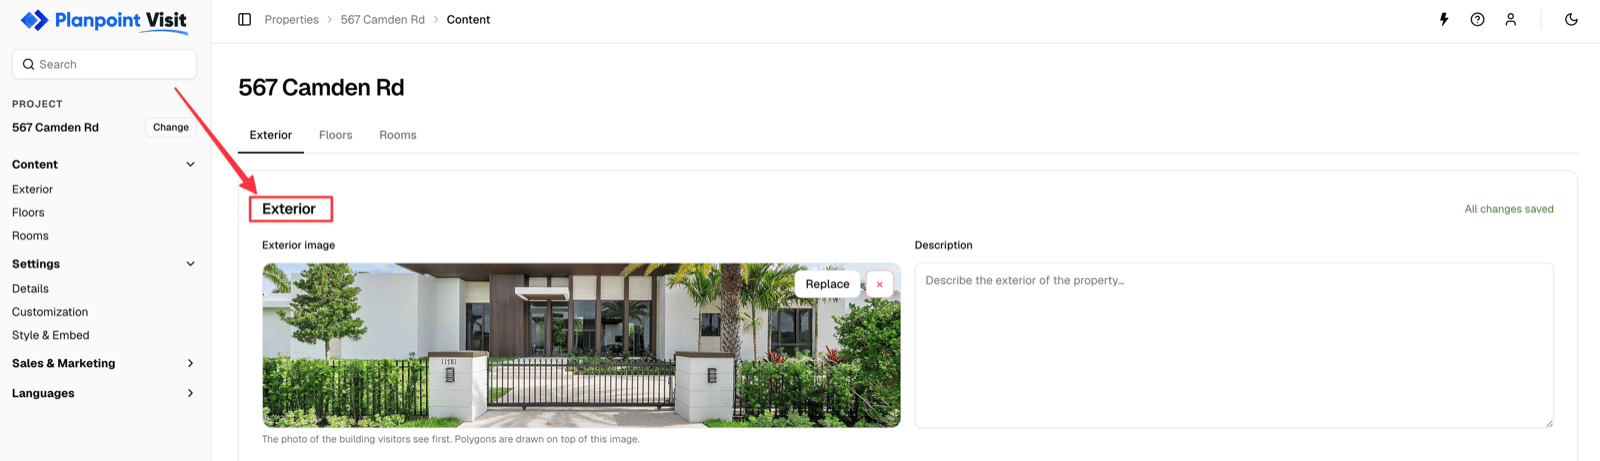
Content → Exterior — the main exterior image
Description
A short paragraph about the outside of the property — the street, the garden, the orientation. It is optional.Additional 360° exteriors
Upload up to 10 extra photos of the same building from other angles. The viewer then shows arrows so a buyer can turn around the property. Click + Add exterior and select several files at once — they all upload in one go.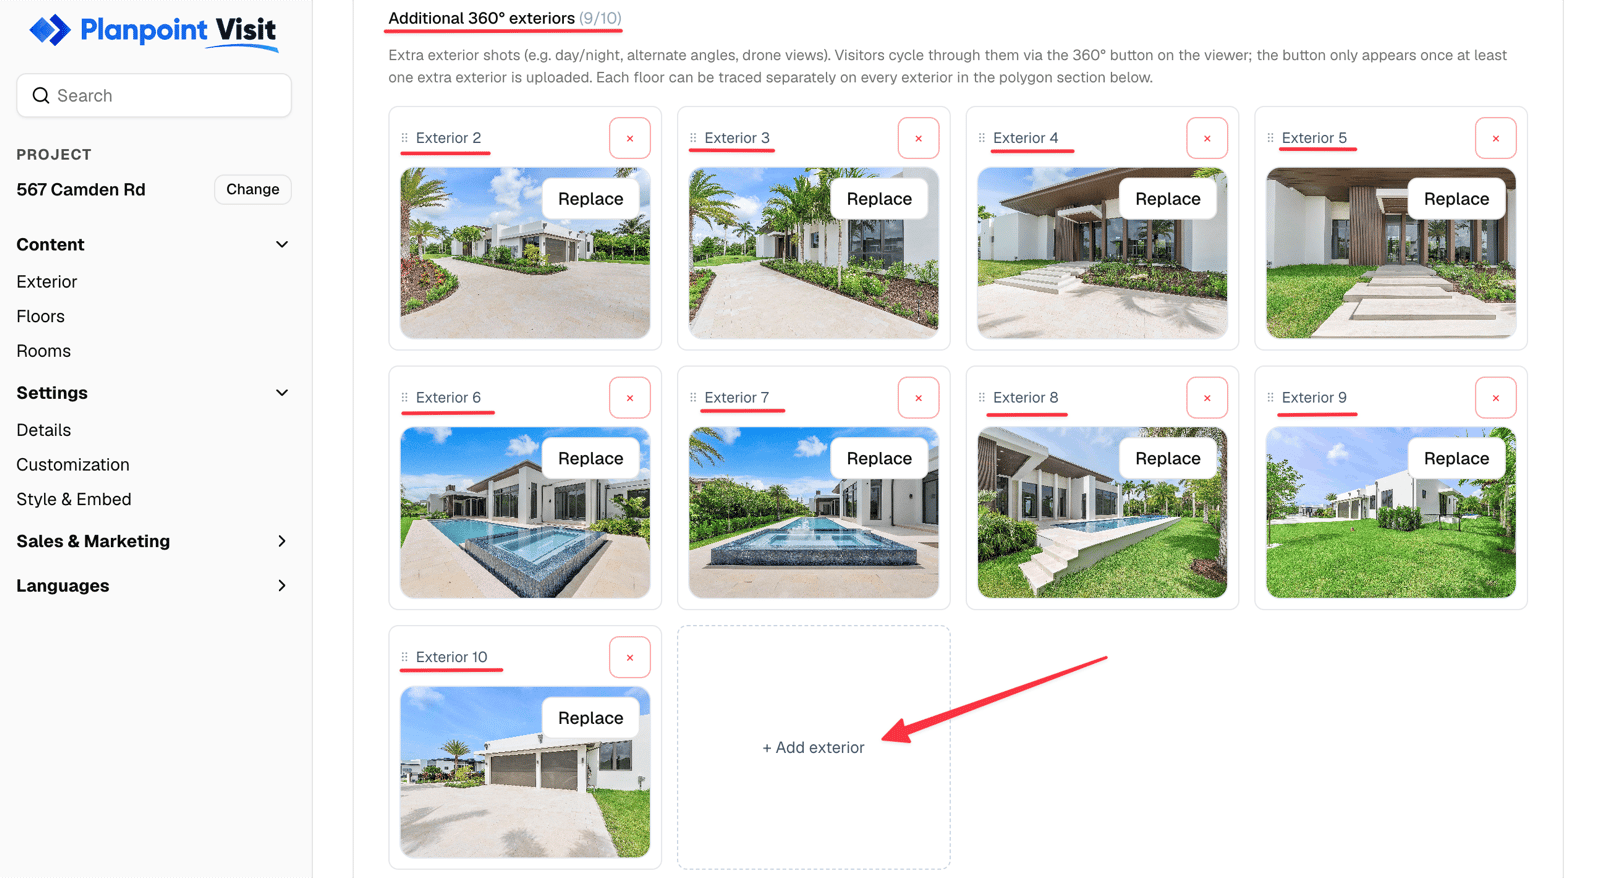
Additional 360° exteriors — select several files in one upload
Floor outlines
This is the step that makes the exterior interactive. For each exterior photo, you trace the shape of every storey on the facade.Detect floor outlines with AI
Once you have uploaded an exterior image and added the property’s floors, click Detect floors · 15 credits beside the floor selector. Planpoint analyzes the active exterior with its best-quality detection model and proposes one outline for each visible storey. The results open in a fullscreen review before anything is applied. Step through the proposed floors, rename them if needed, turn off any outline you do not want, then click Add floors. You can refine any applied outline afterward with the polygon editor. If you prefer to draw the boundaries yourself, or need to correct a detected outline, use the manual workflow below.1
Pick the exterior
Use the Exterior: selector to choose which photo you are tracing.
Exterior 1 is the main image; the rest are your additional 360° views.2
Pick the floor
Use Editing floor: to choose which storey you are drawing. Floors you have already traced stay visible, faintly, as a reference.
3
Trace it
Click Edit polygon to open the editor fullscreen, then click along the outline of the storey. Click the first point again to close the shape.
4
Save
Use the save (disk) icon in the editor toolbar. The editor closes and returns you to the exterior page.
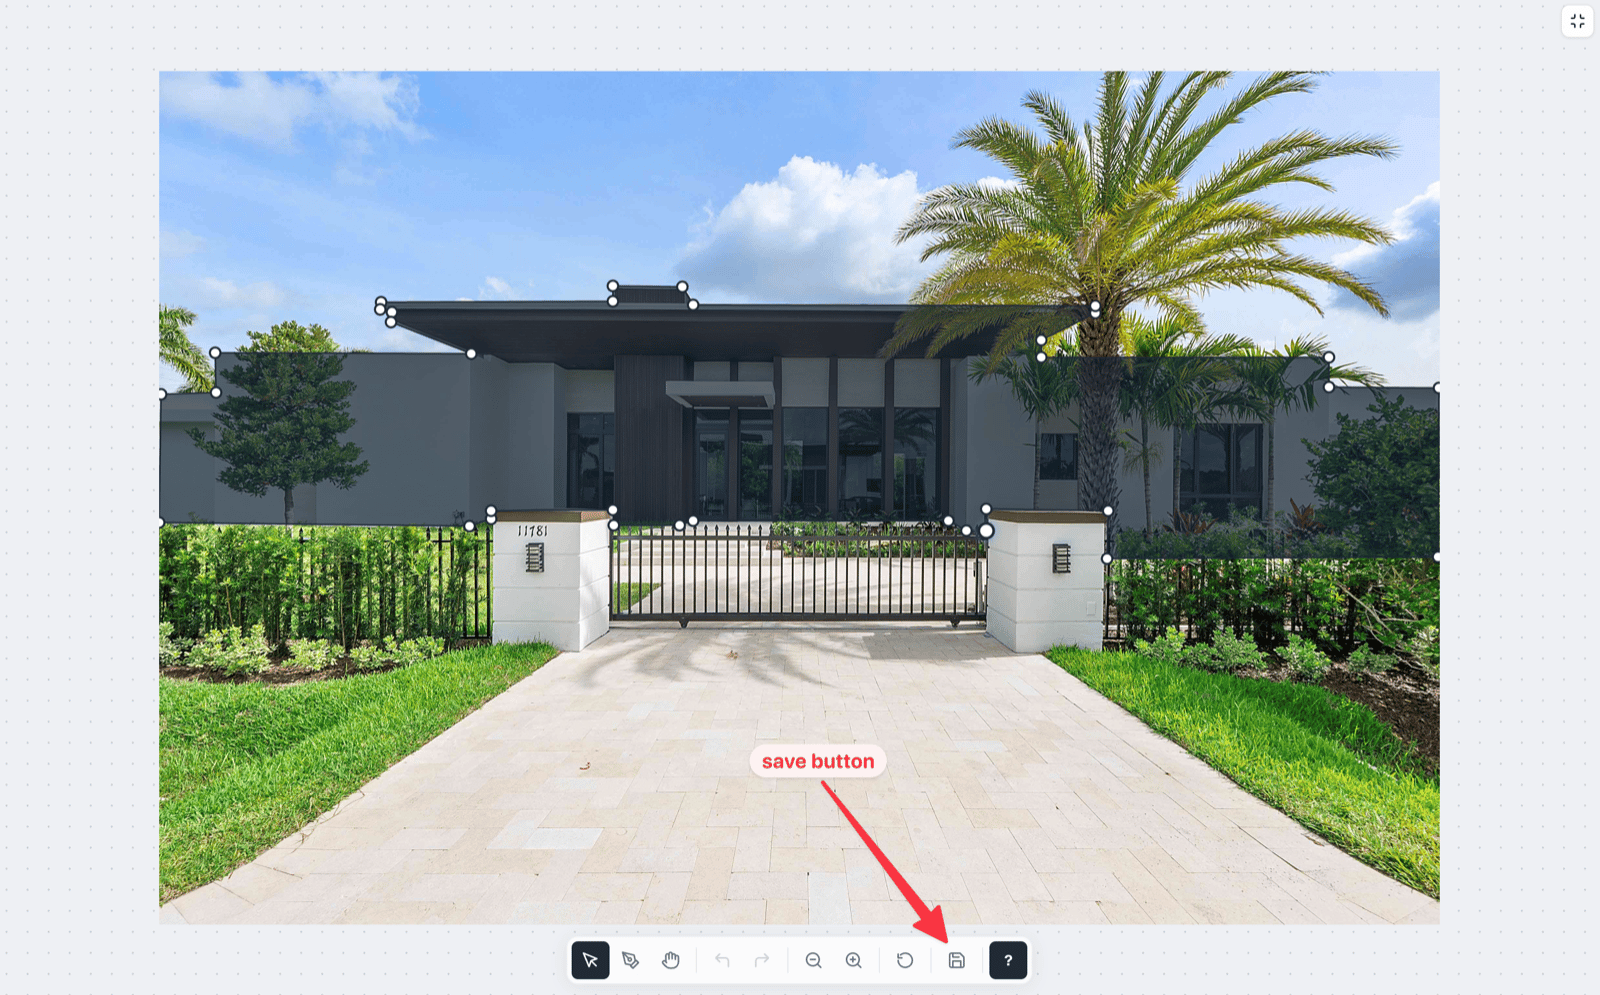
Tracing a storey in the fullscreen polygon editor
A floor outline from the first point to the save icon
Polygon editor shortcuts
Exterior viewpoint
The exterior viewpoint marks where the photographer stood when they took the exterior photo, so buyers can orient themselves the moment they look at a floor plan. Drag the marker onto the floor plan and rotate the cone to point in the direction of the shot.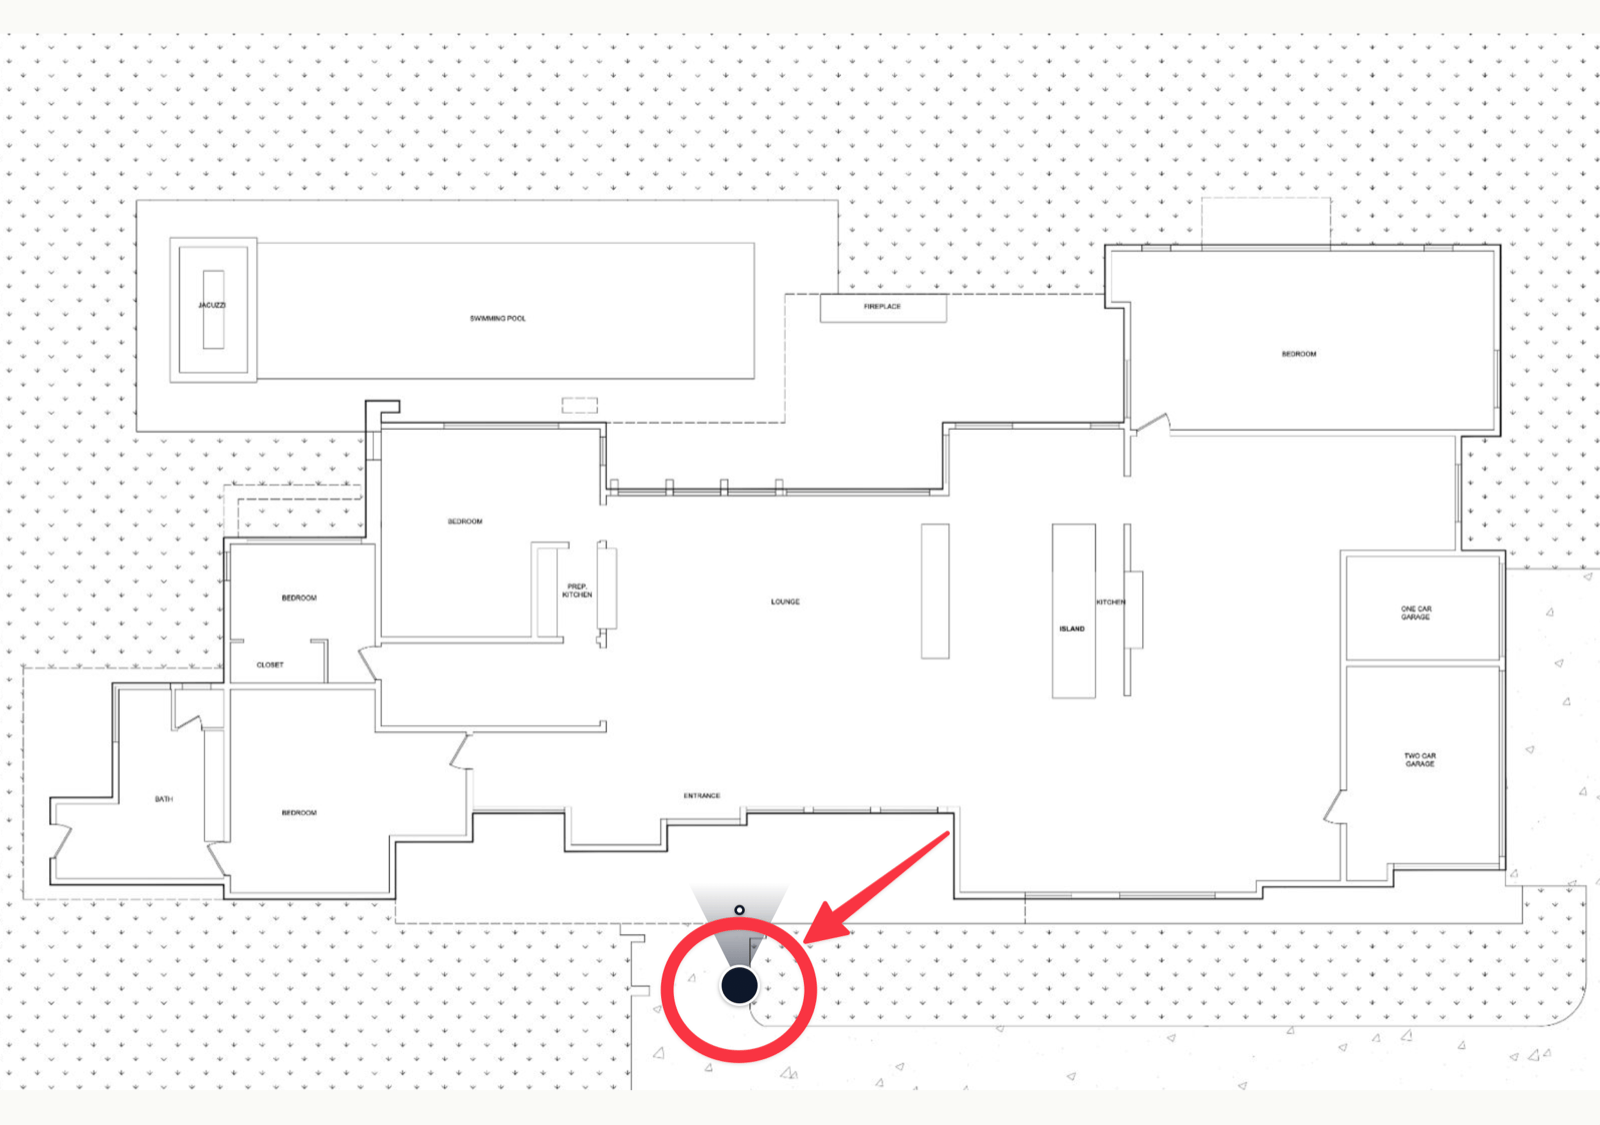
The exterior viewpoint — position and direction of the outside photo
The exterior viewpoint is shared across all floors. Set it once and every floor plan shows the same outside marker.